| Якорь | ||||
|---|---|---|---|---|
|
| CSS Stylesheet |
|---|
.top-button { background-image: url(https://confluence.twin24.ai/download/thumbnails/23986188/baseline_keyboard_arrow_up_white_18dp.png) !important; background-position: center; background-color: #47a7f5 !important; background-repeat: no-repeat; box-shadow: -1px 1.5px 3px #999; color: #47a7f5 !important; border-radius:50px !important; position: fixed; bottom: 45px; left: 93.5%; width: 50px; height: 50px !important; font-size: 12px !important; padding: 14.5px !important; z-index: 2; } .top-button:hover{ background-color: #65b9ff !important; color: #65b9ff !important; } .page-header{ background-color: #232838; background-repeat: no-repeat; background-position: center; width: auto; height: 100px; background-image: url(https://confluence.twin24.ai/download/attachments/23986188/logo_twin-02.png); background-size: 10em; color: #fff; font-size: 20px; padding: 20px; } .page-footer{ background-color: #232838; background-image: url(https://confluence.twin24.ai/download/thumbnails/23986188/decorated-pattern-dark.png); width: auto; height: 10px; color: #fff; text-align: end; font: small-caption; padding-inline-end: 30px; padding-top: 200px; padding-bottom: 30px; } .page-headline{ background-image: url(https://confluence.twin24.ai/download/thumbnails/23986188/Solid256dot8_2changed.png); background-repeat: no-repeat; background-position-x: -227px; background-position-y: center; padding: 20px; background-color: #007bff; width: auto; height: 10px; color: #fff; text-align: center; font: caption; font-weight: 600; } .tabs-menu{ padding-left: 85% !important; } |
In the Notifications section you can send automated texts and advertisement messages to your clients using different communication channels.
| Message Box | ||||||
|---|---|---|---|---|---|---|
| ||||||
|
Working with notification templates
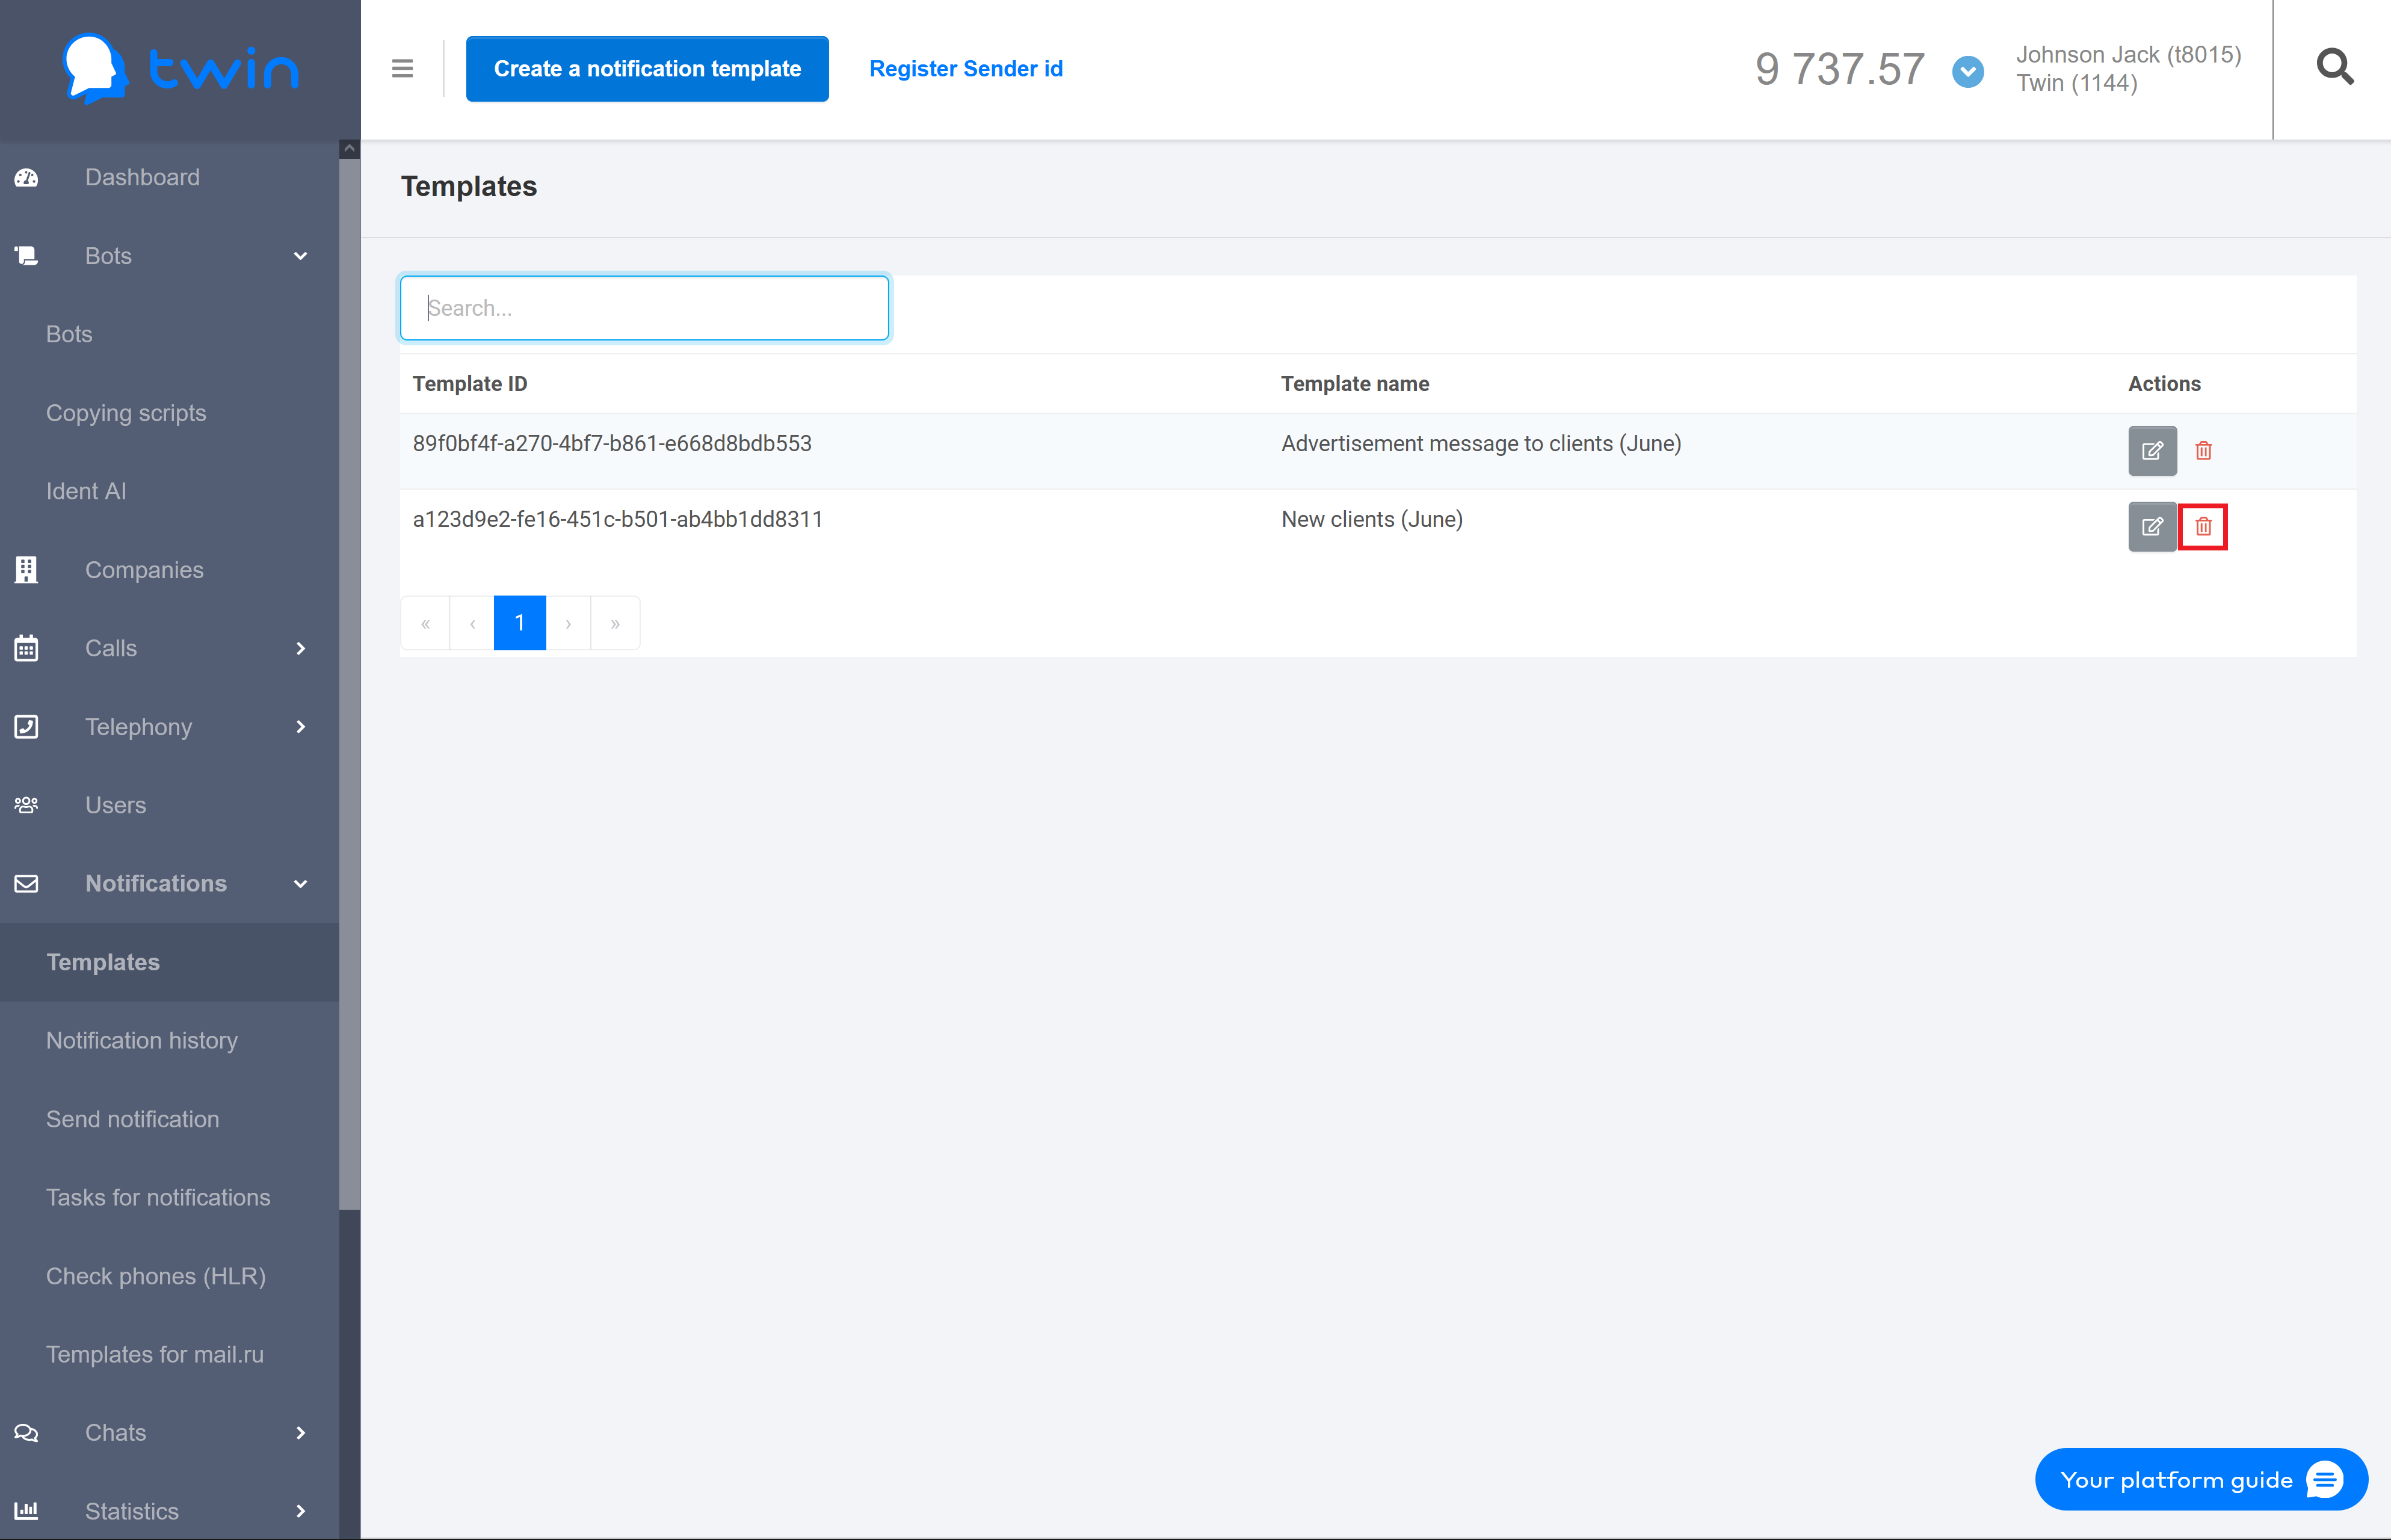
On the side menu click Notifications – templates. As a result the Templates page will open.

The Templates page contains a list of all notification templates that you can use to send automated texts and advertisement messages to your clients.
| Подсказка |
|---|
Each notification template contains the sender name, the message text, and other parameters. |
| Примечание |
|---|
To send automated texts and advertisement messages to your clients you must register the sender name with your mobile network carrier. The sender name that you plan to use must match the name of your company or your website. After that you need to create a request to the technical support so that you can use the registered sender name in your account. |
Creating notification templates
Click Create a notification template at the top of the page.
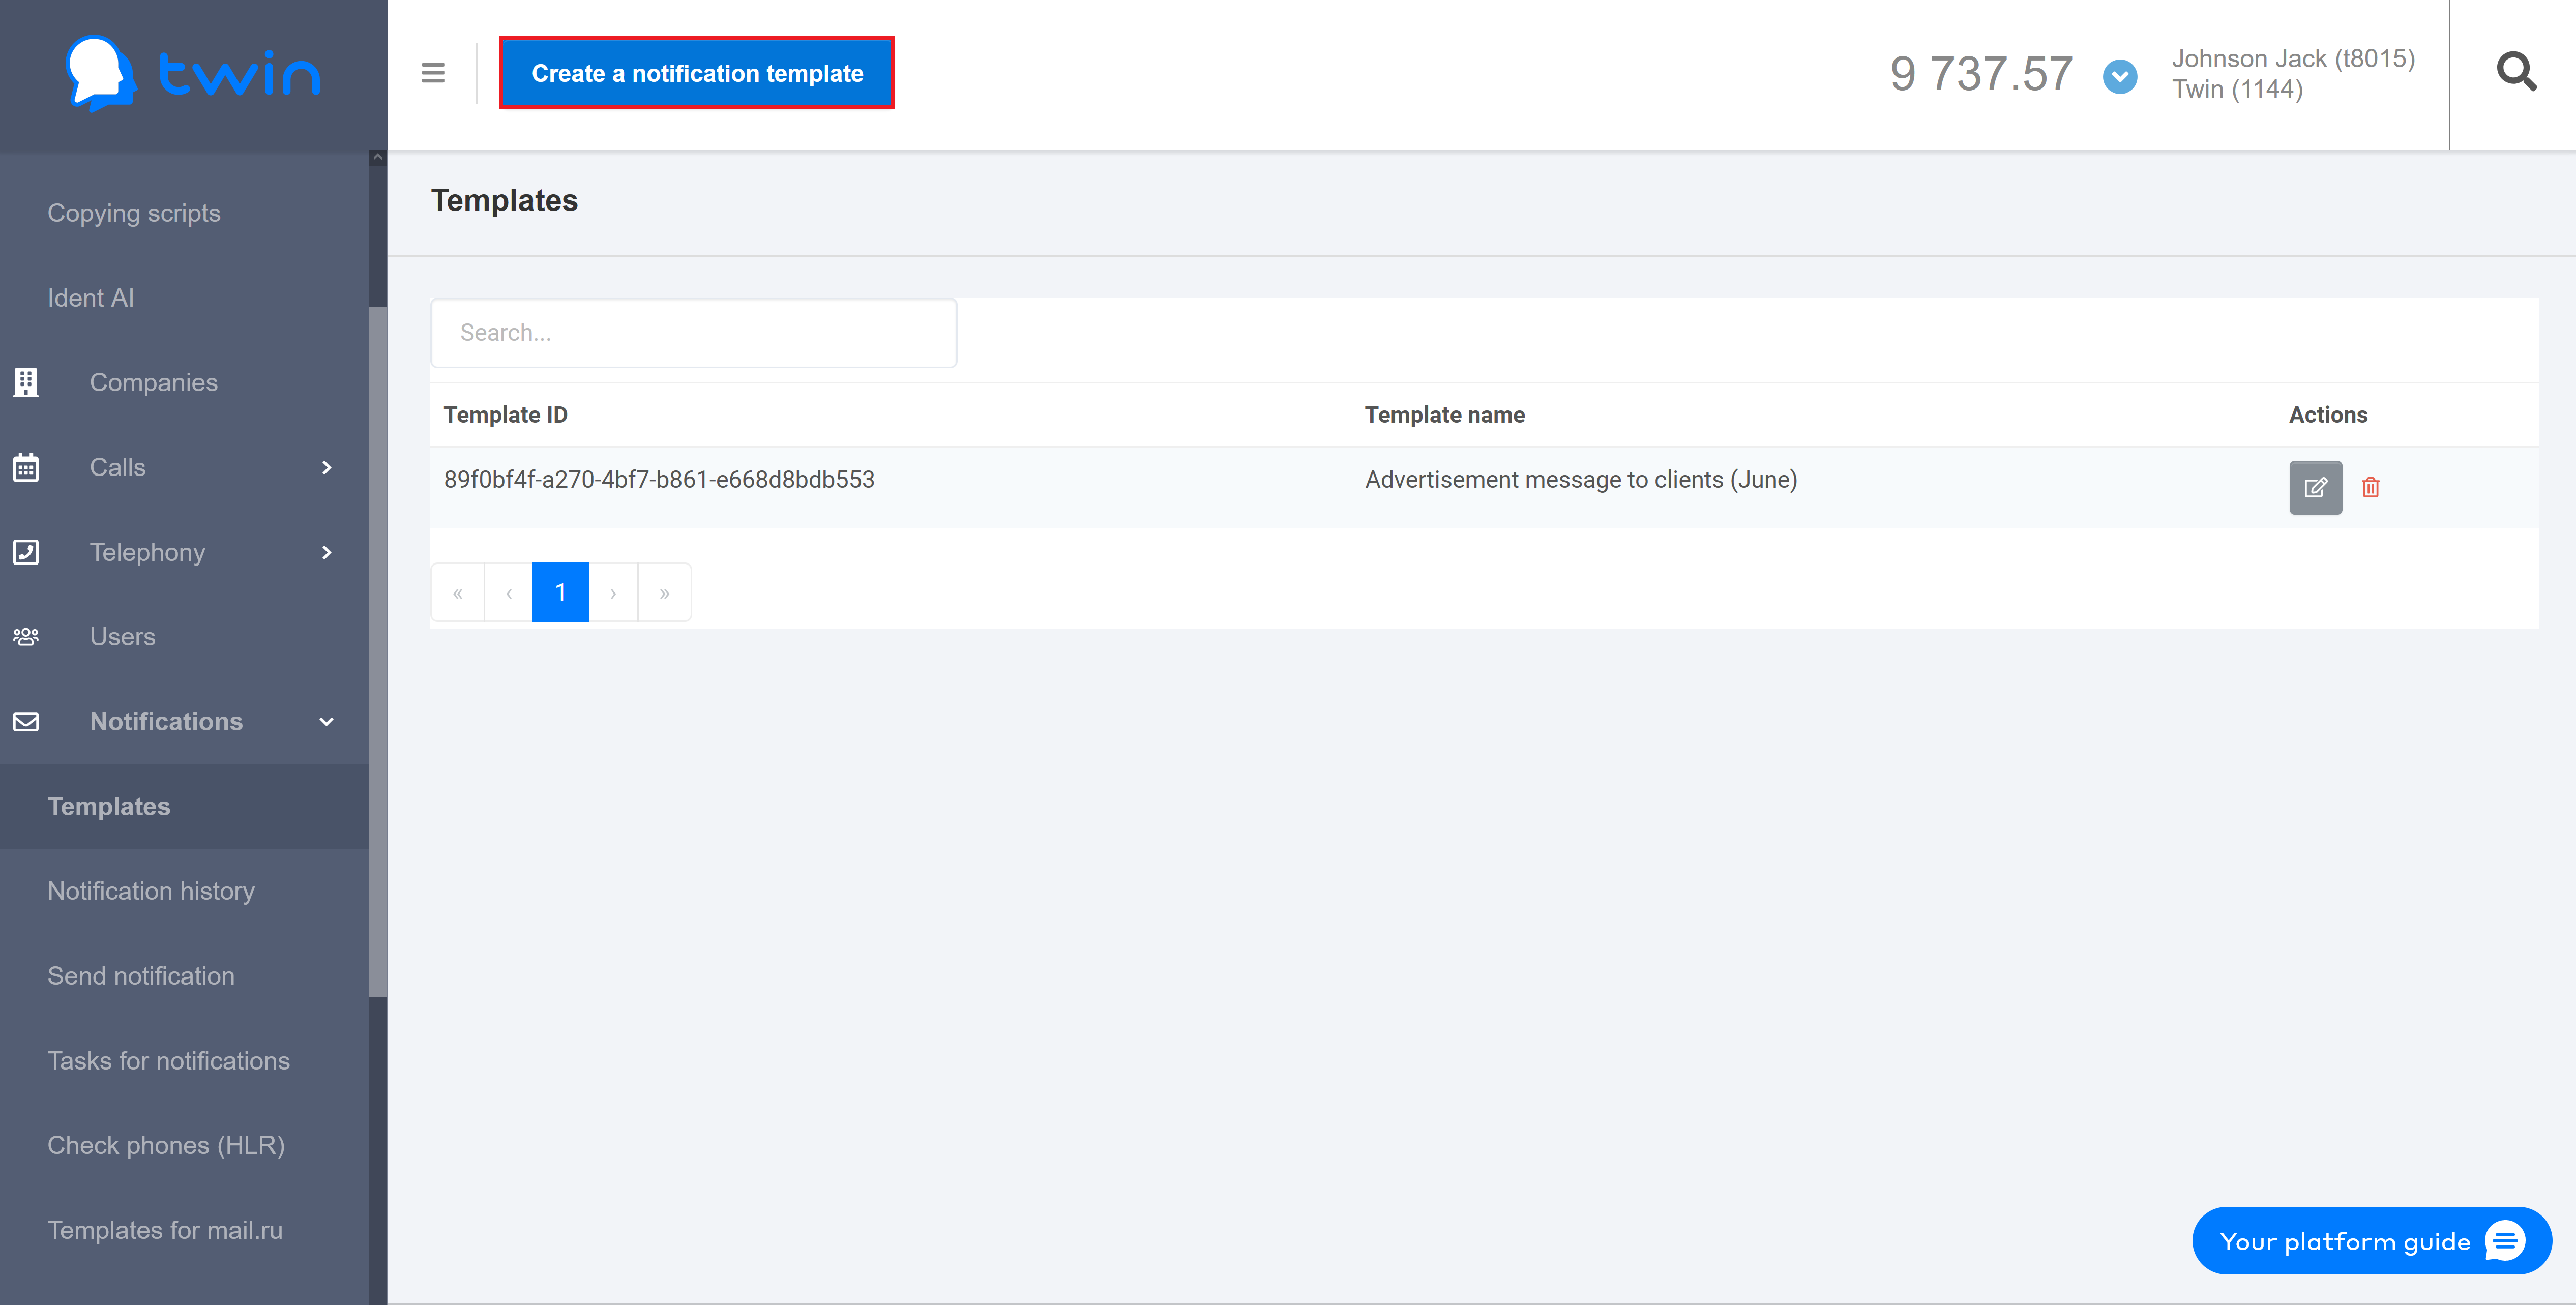
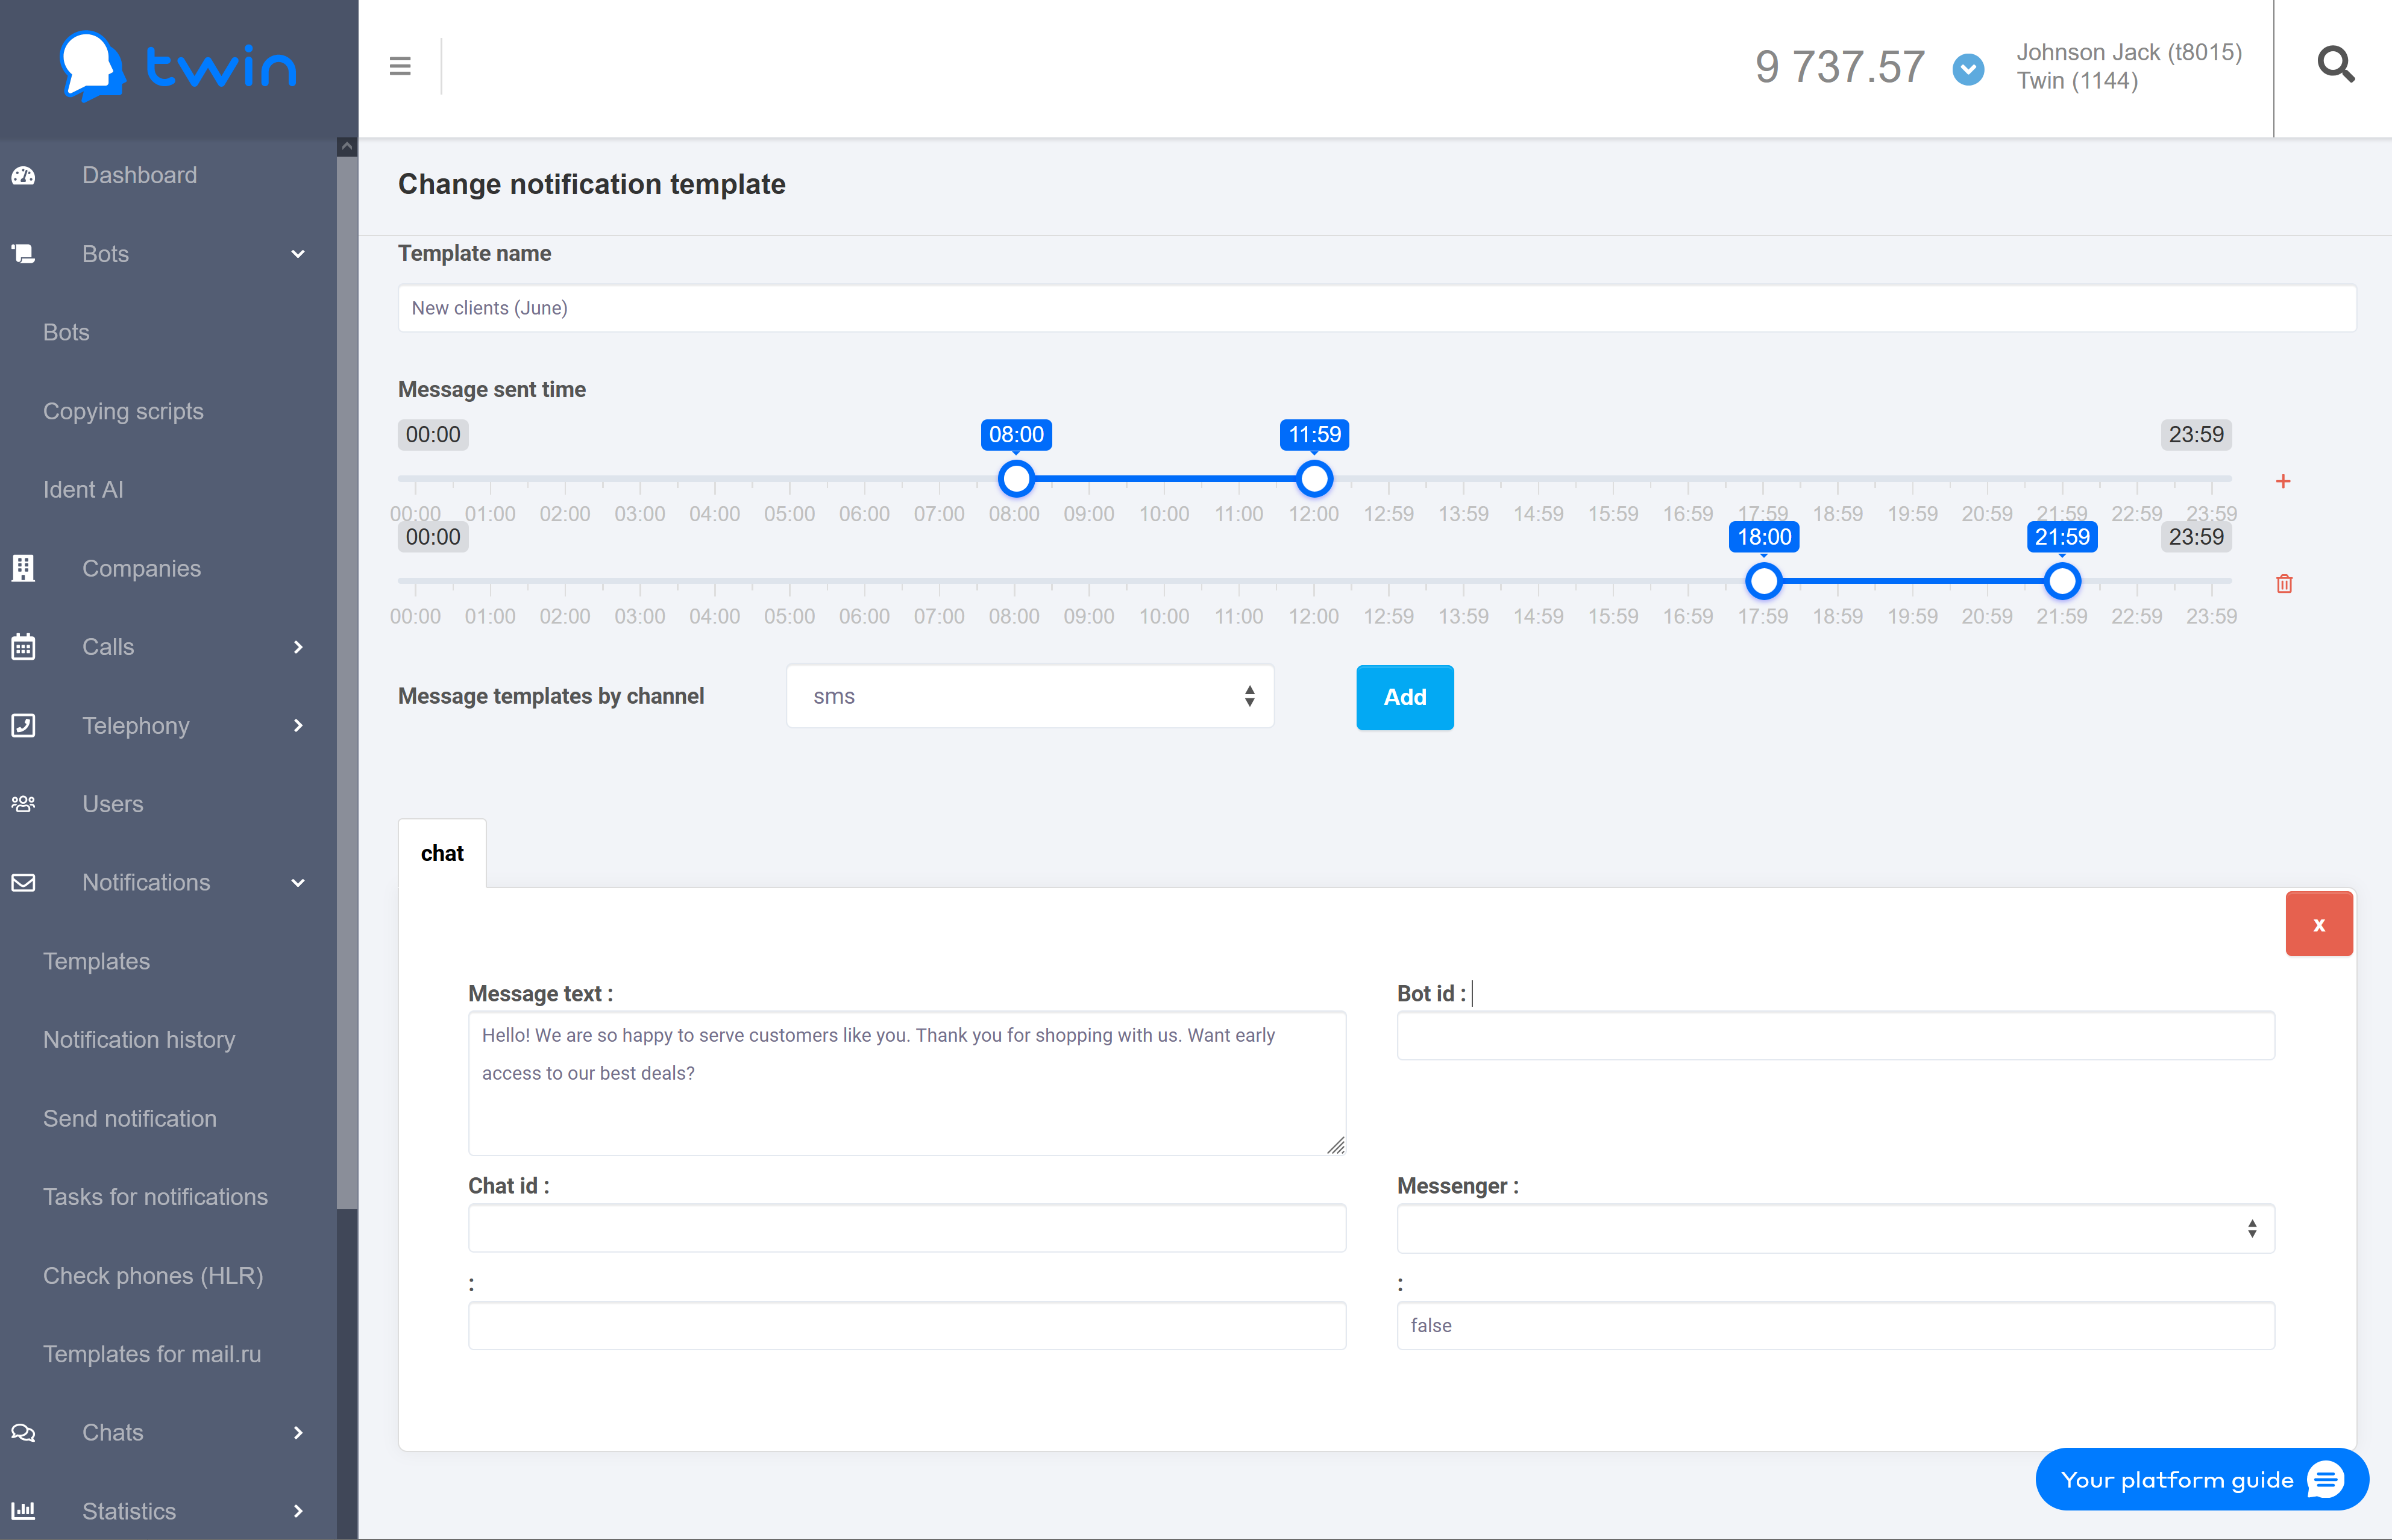
As a result a new page will open as shown in the image below.

To create a new notification template, do the following:
1. In the Template name field enter the name of a new template.
| Информация |
|---|
It is recommended to use simple and concise template names. Later this will help you remember why you created a certain notification template. |
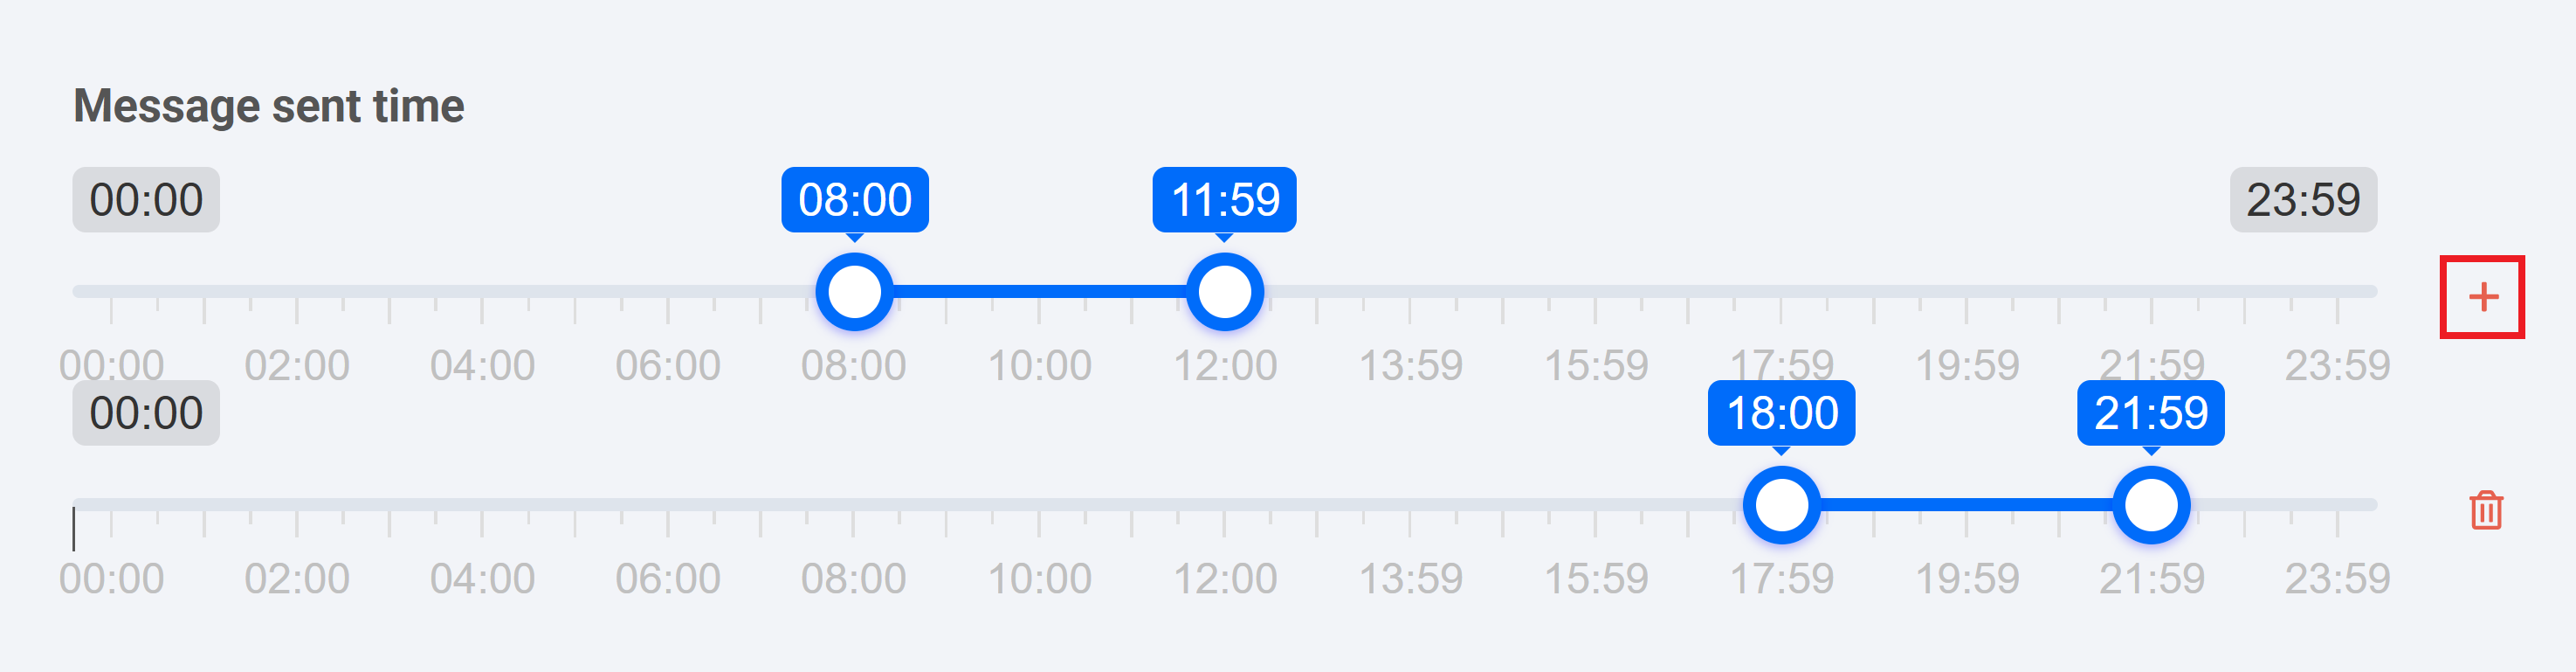
2. In the Message sent time section select the period of time for the system to send automated texts or advertisement messages to your clients.
| Подсказка |
|---|
If necessary you can click on the + button and set an additional time period. If you send notifications after the first time period is over, then the system will send them within the second time period.
|
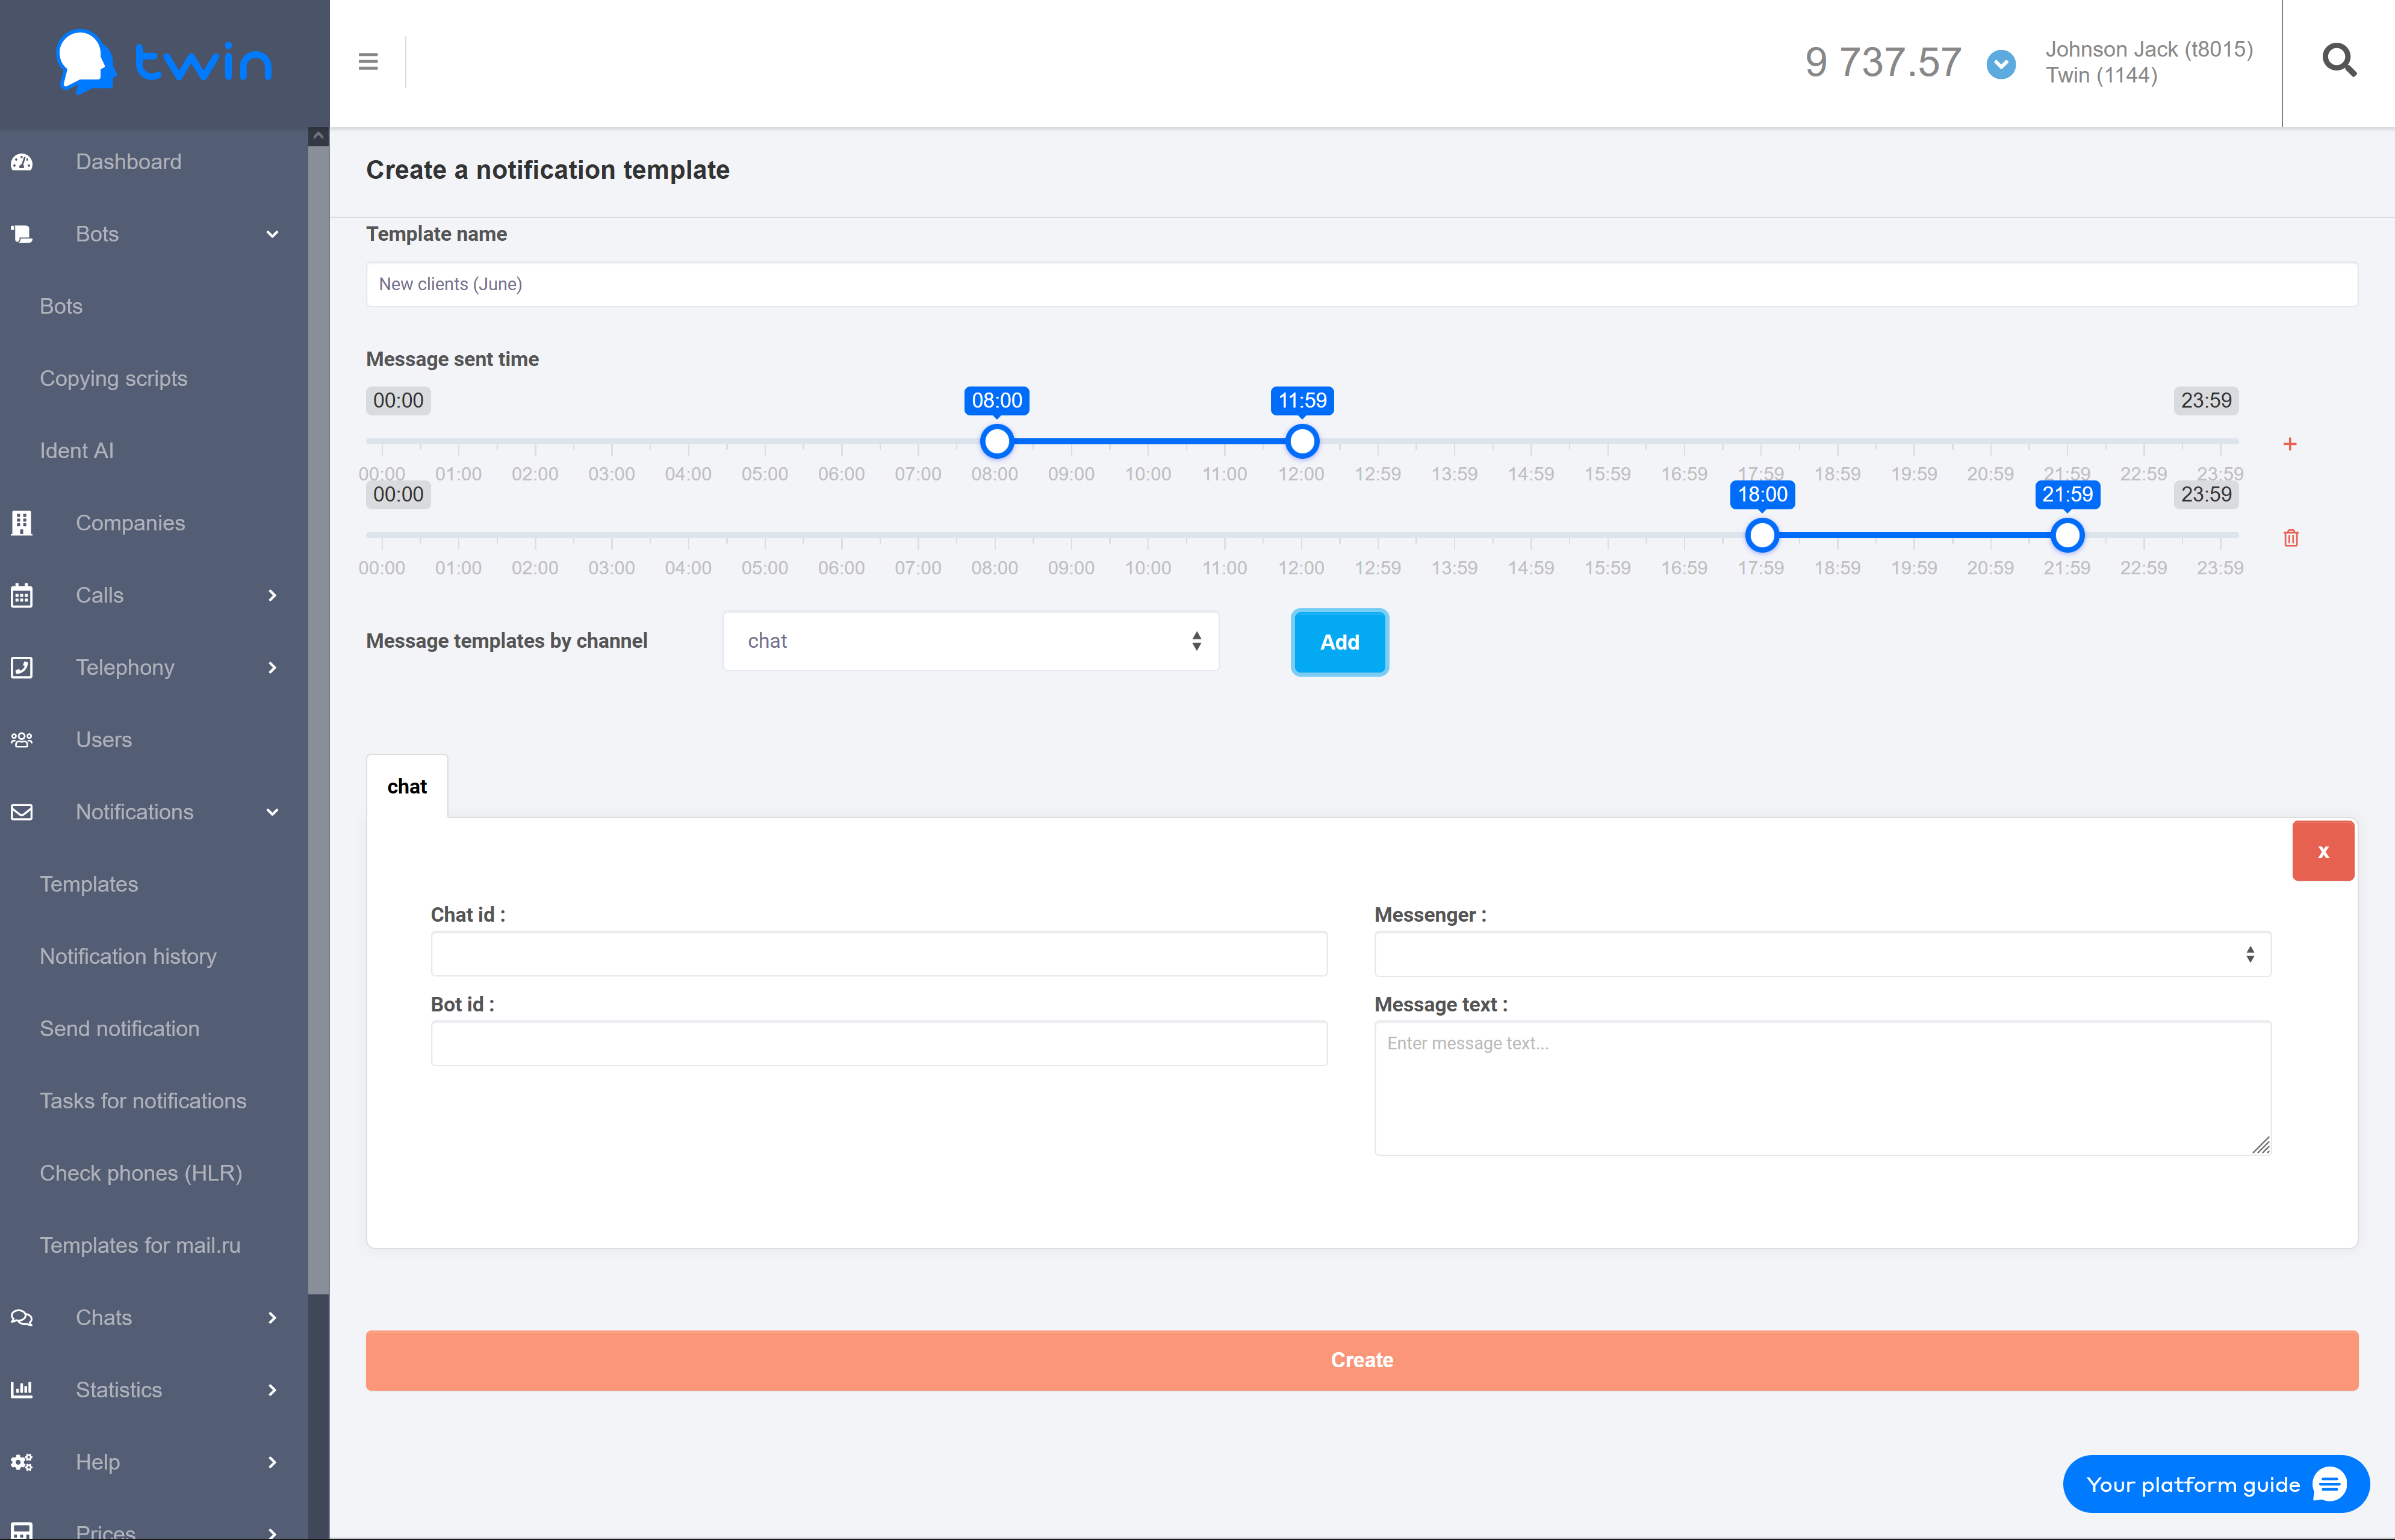
3. In the Message templates by channel field select the necessary communication channel and click Add. The system will use this channel to send notifications to your clients. As a result the section with parameters of the selected communication channel will open.
| Подсказка |
|---|
You can set up one or multiple communication channels at the same time. |
| Информация | ||||||||||||||||||||||||||||||||||||||
|---|---|---|---|---|---|---|---|---|---|---|---|---|---|---|---|---|---|---|---|---|---|---|---|---|---|---|---|---|---|---|---|---|---|---|---|---|---|---|
| ||||||||||||||||||||||||||||||||||||||
|
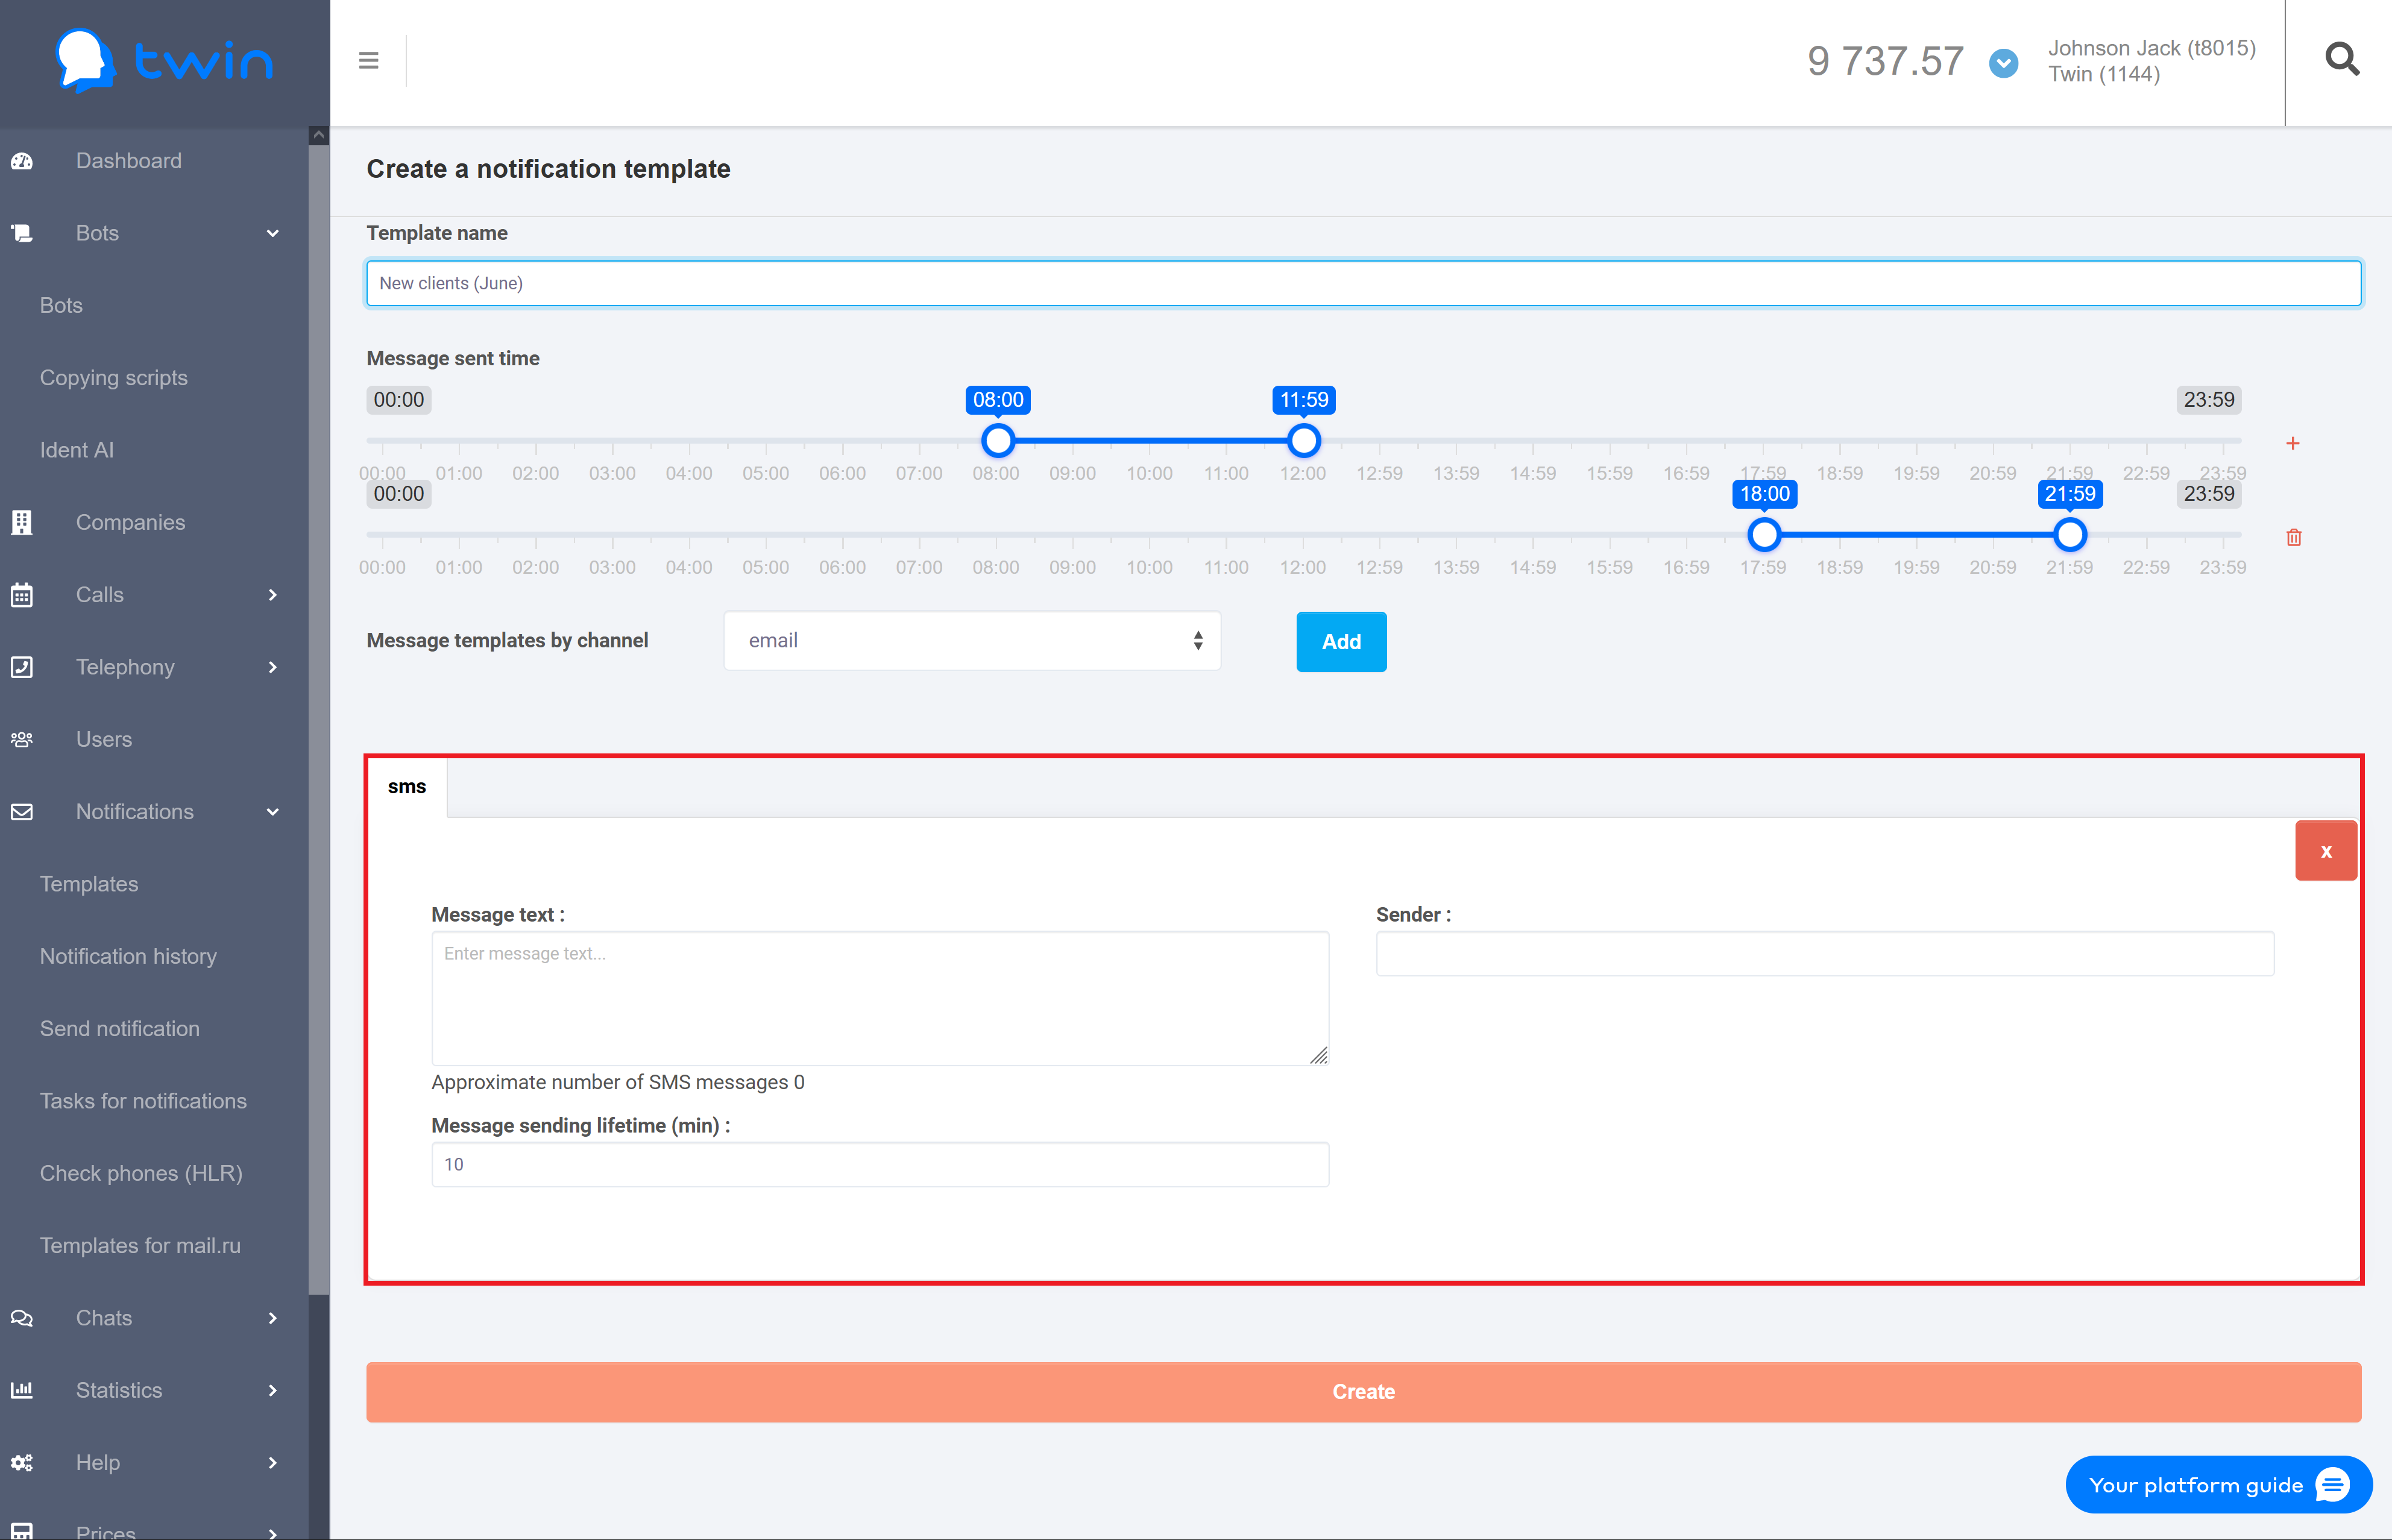

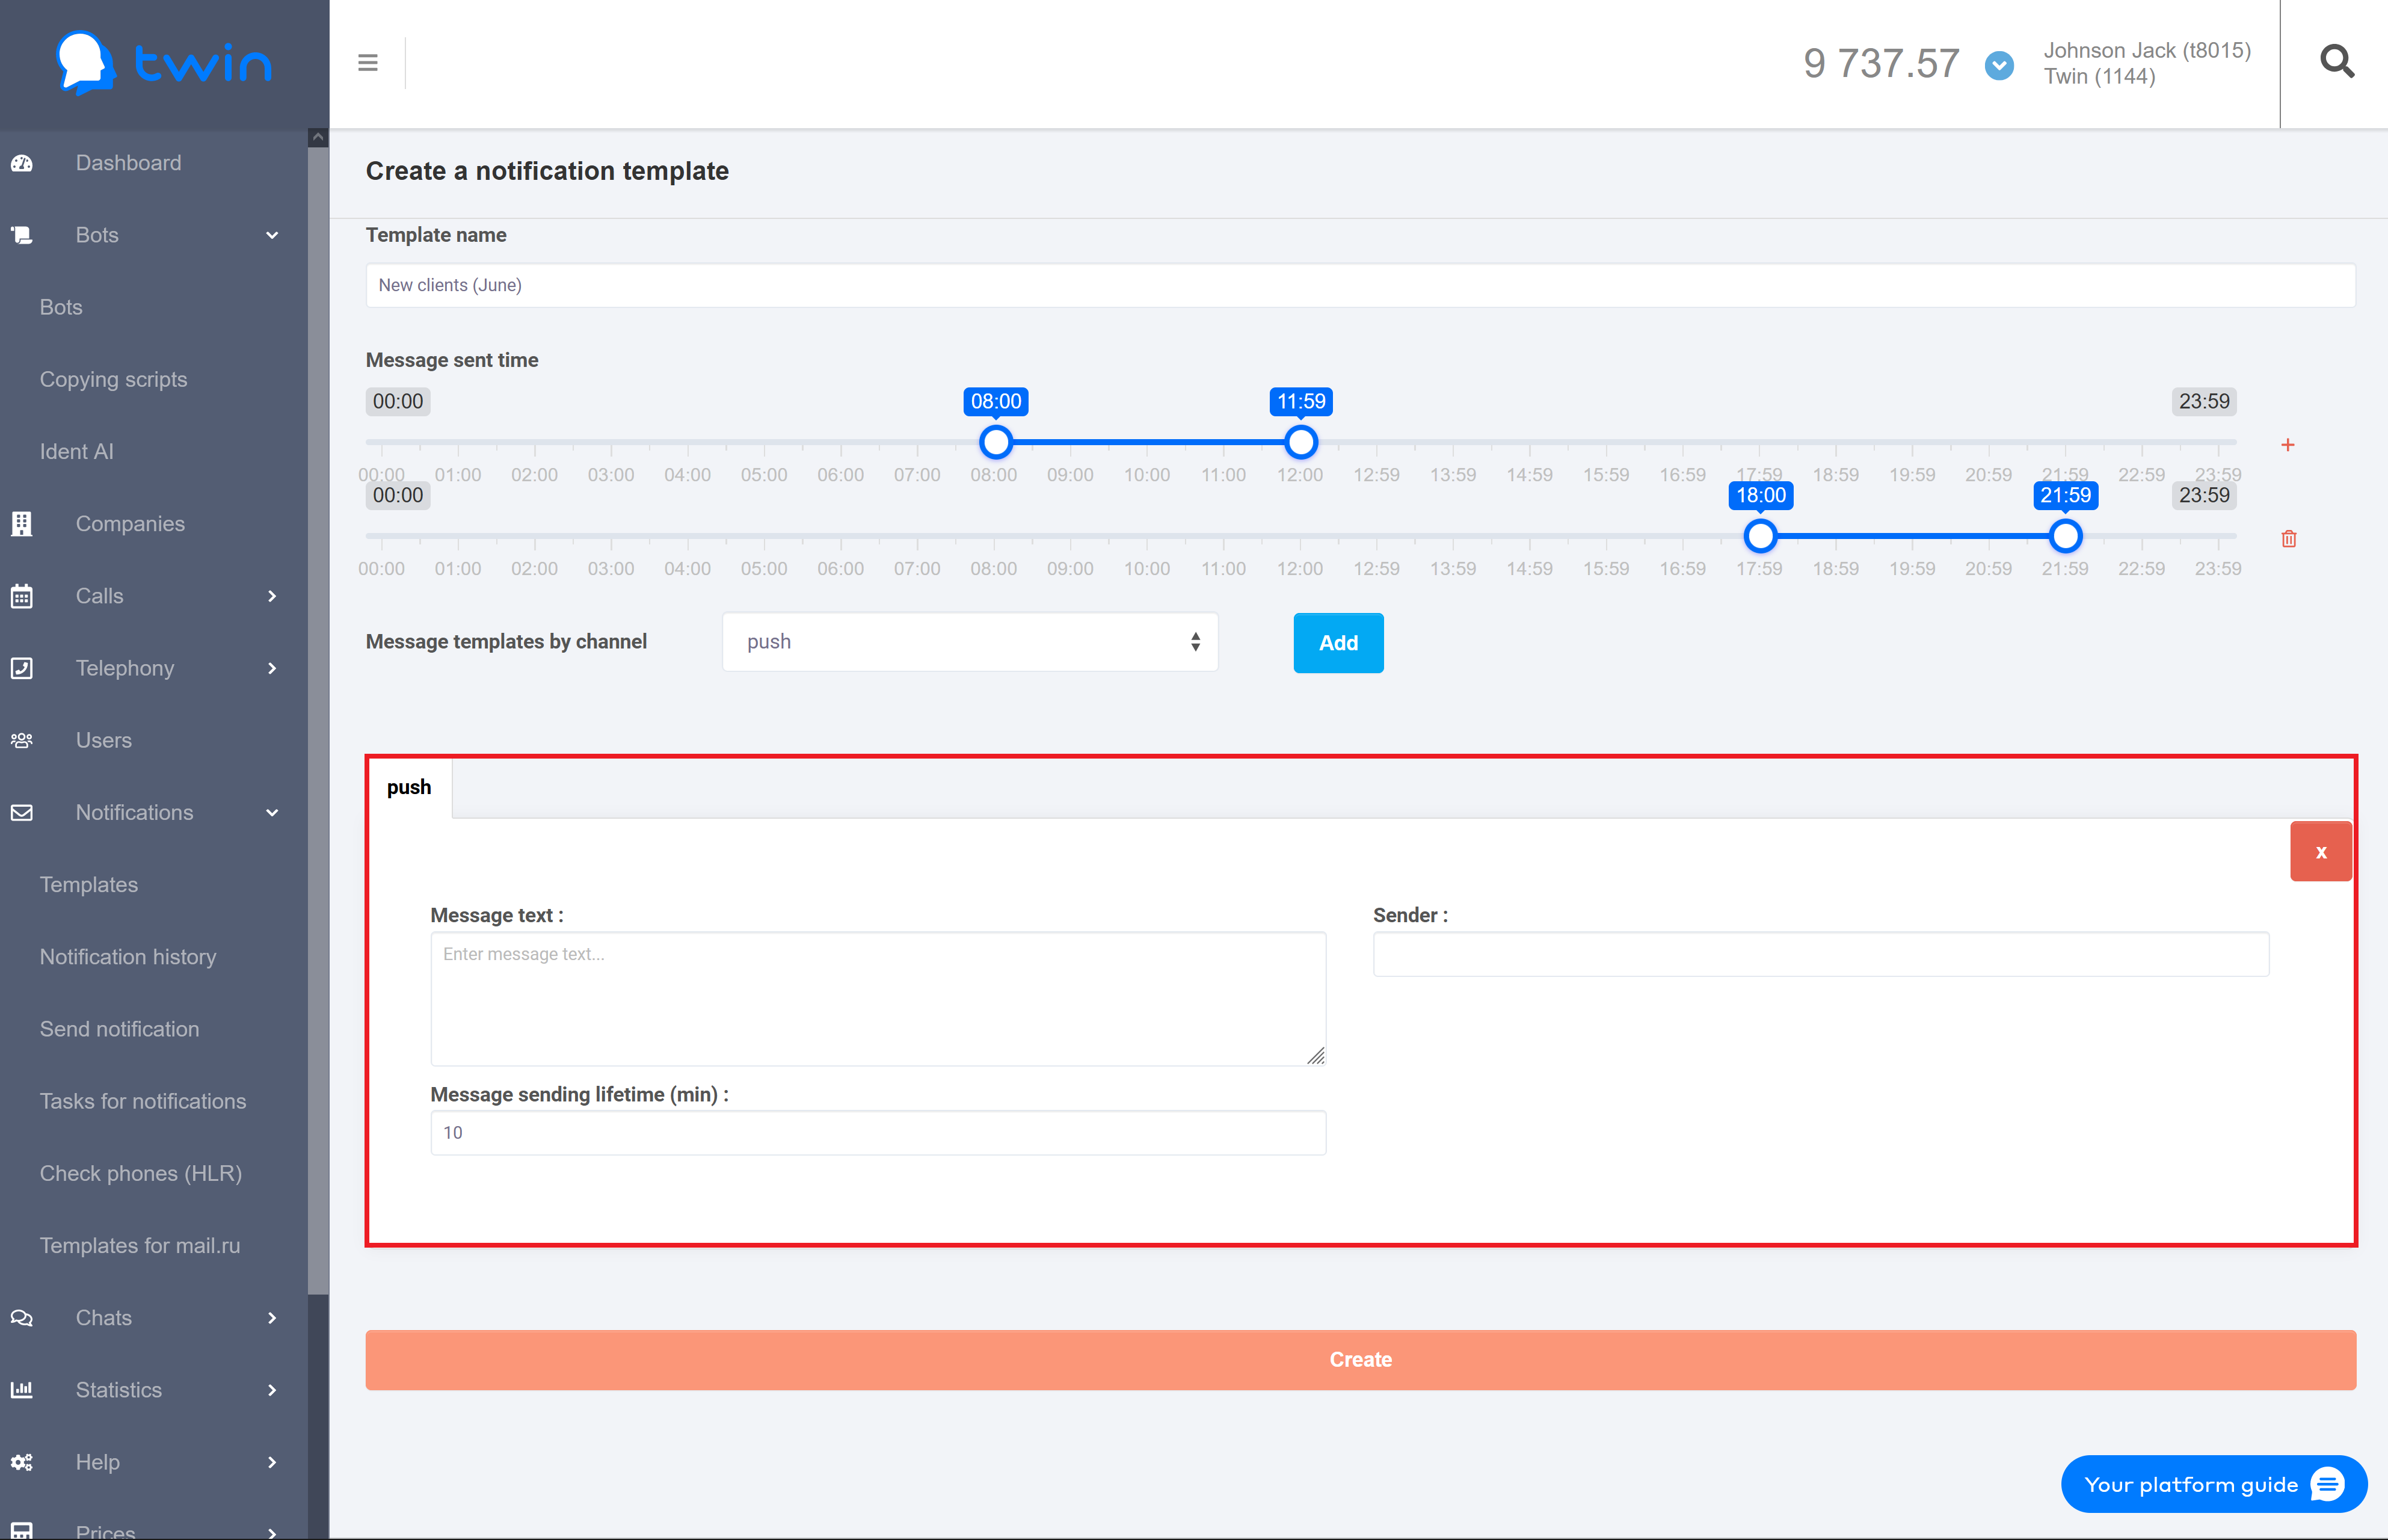
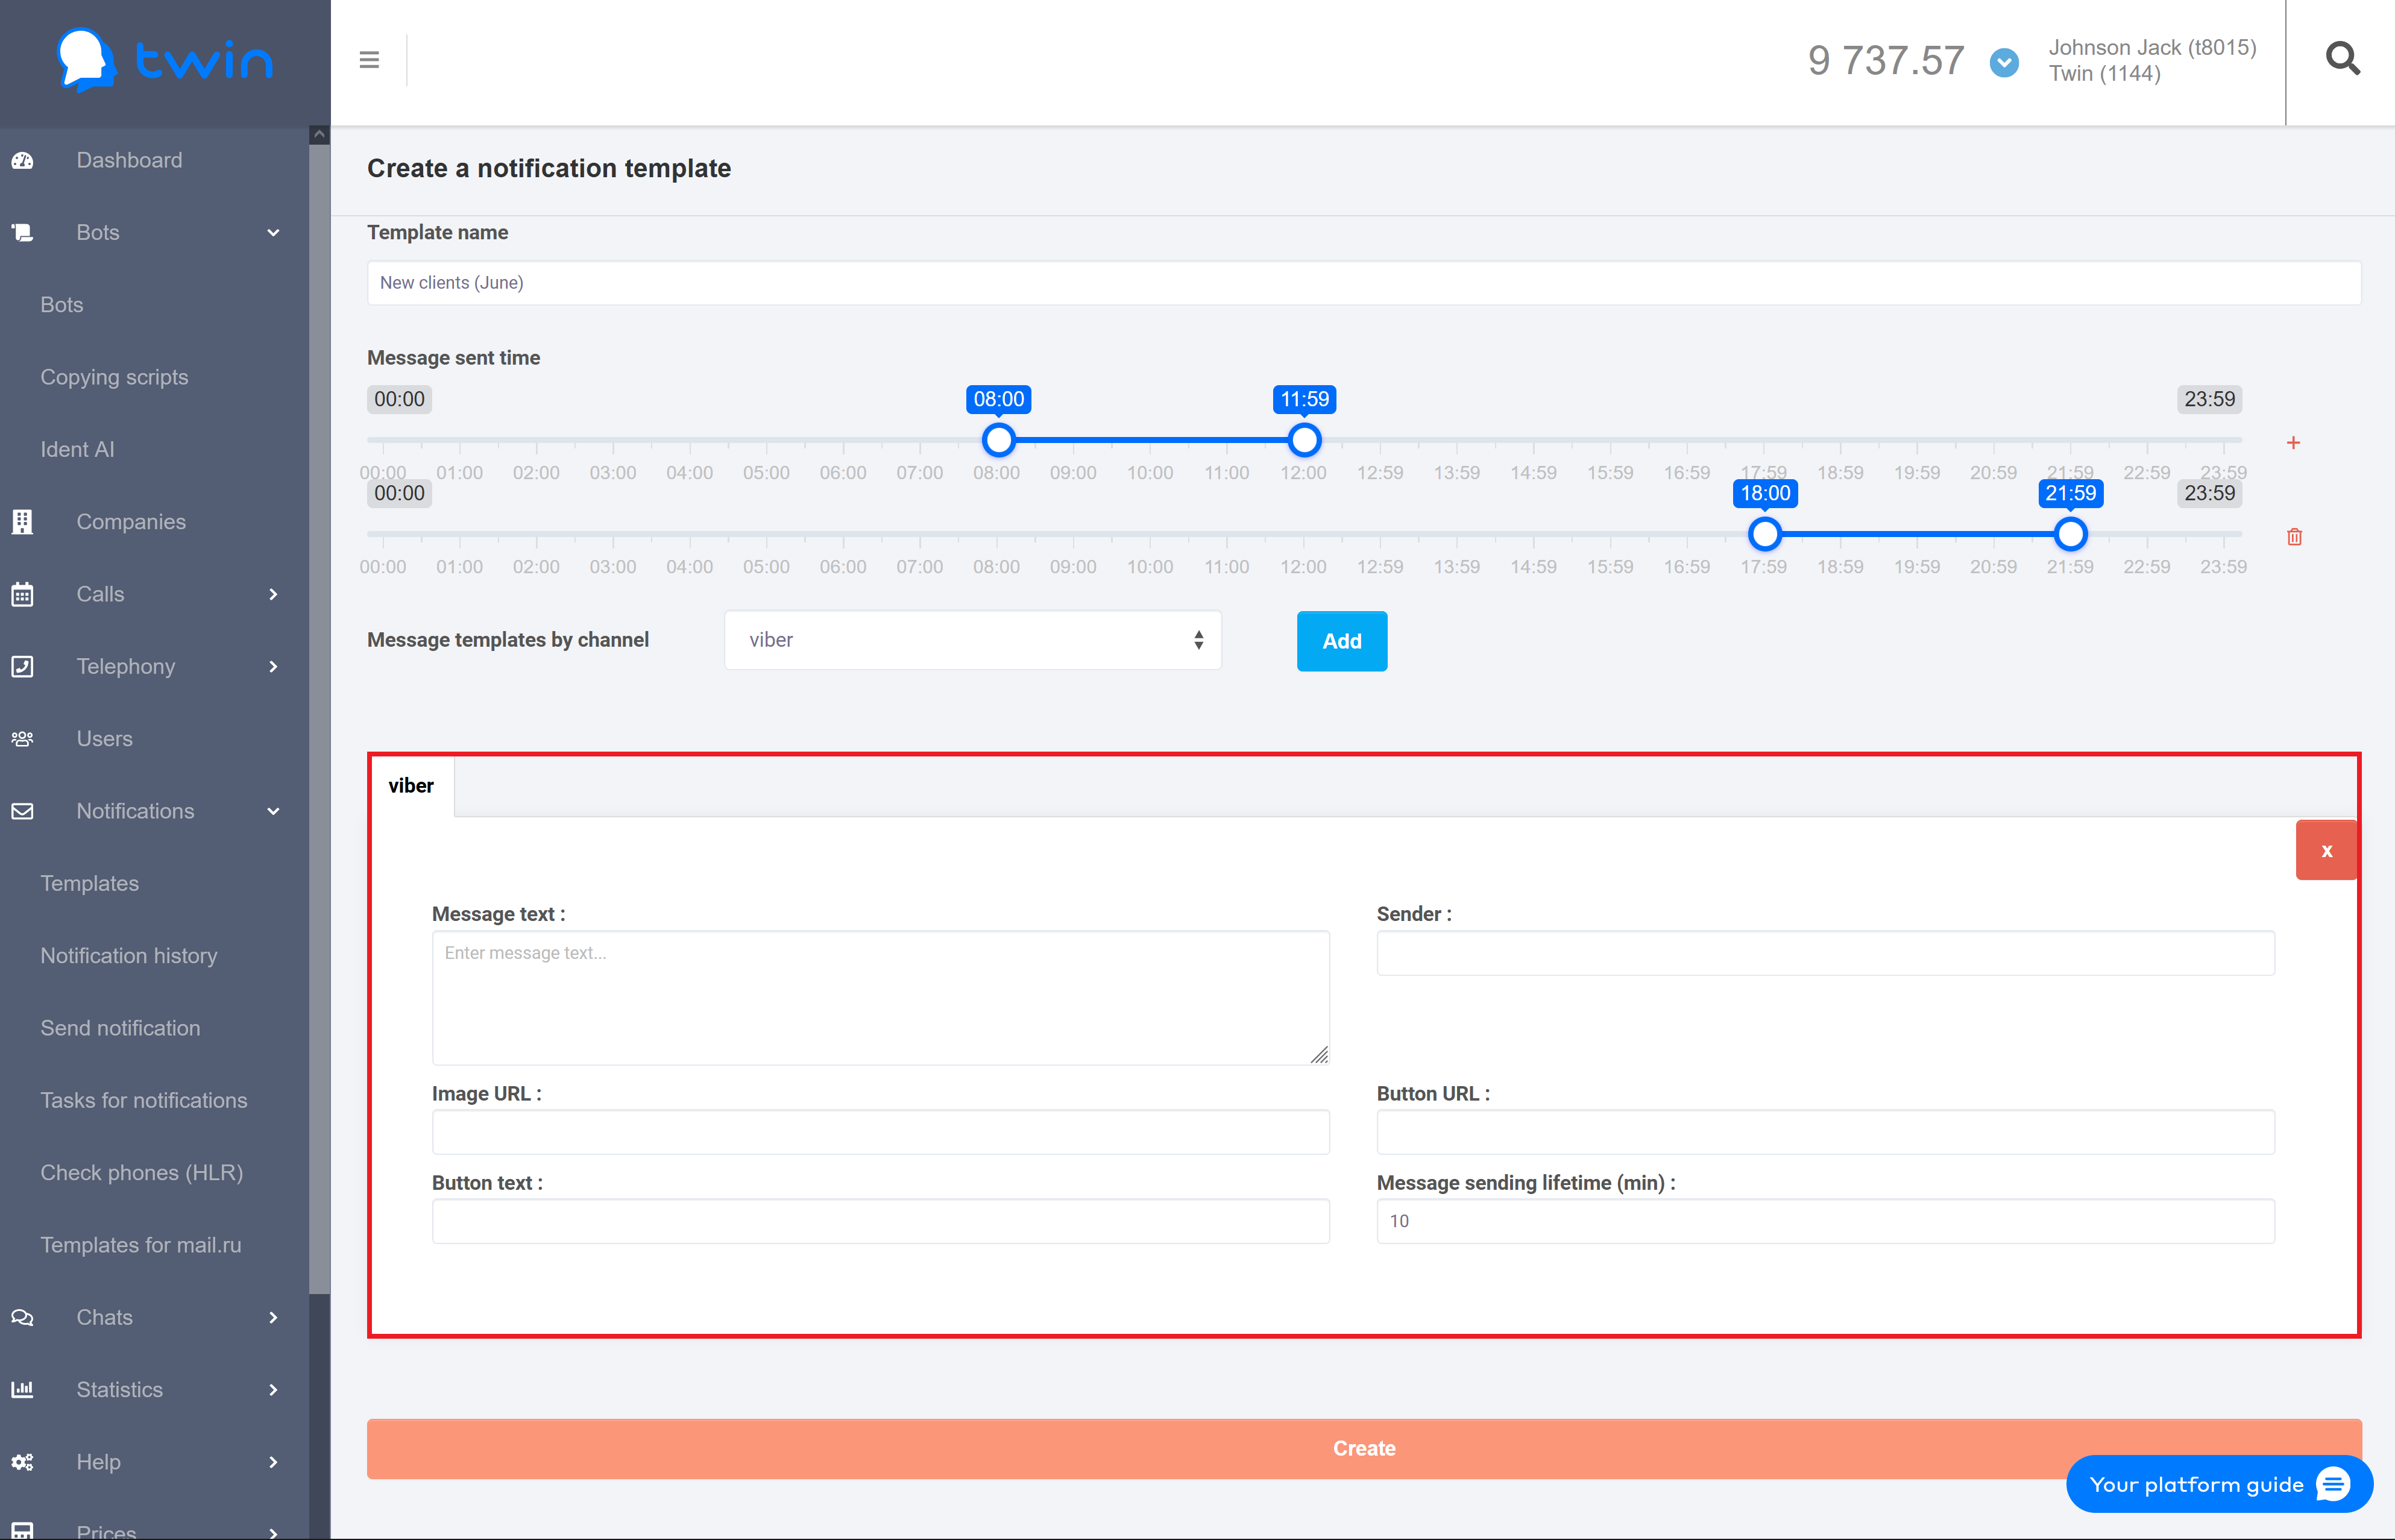

4) To save changes click Create.
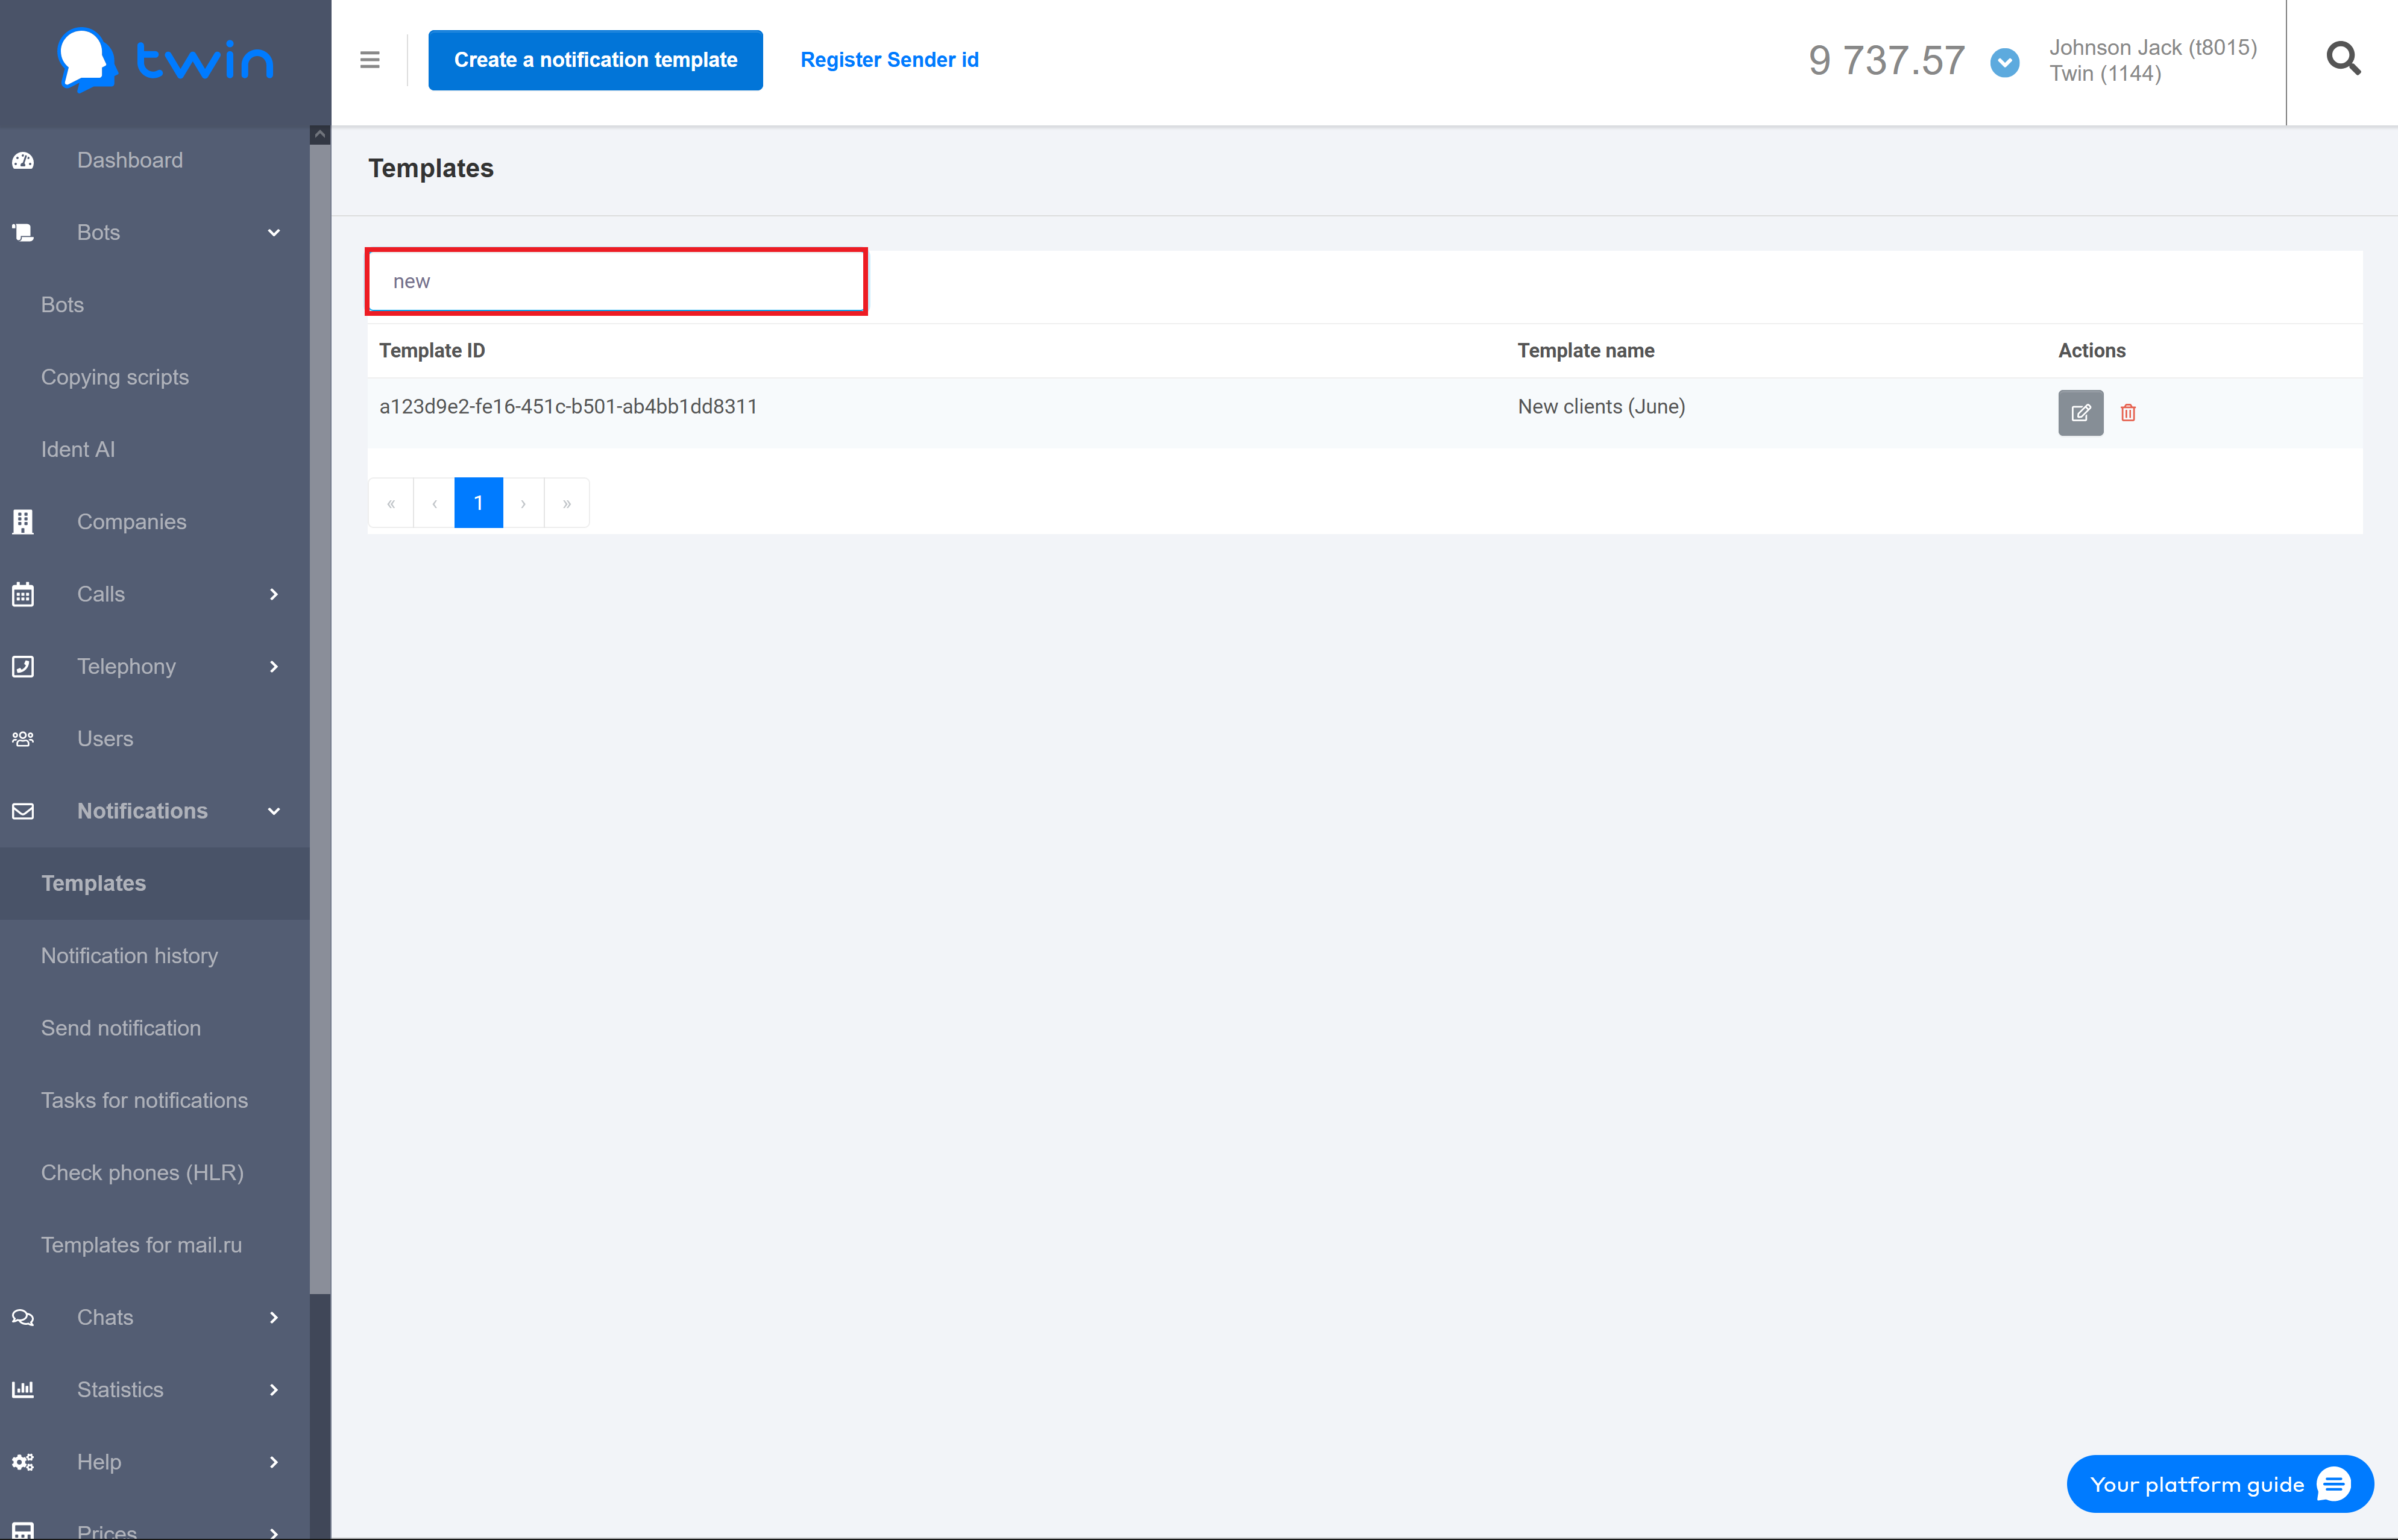
Searching for notification templates
If there are a lot of templates on the list, you can filter records you need or search for the necessary record by a template ID or template name.
For this enter the necessary value in the search field at the top of the page.
| Подсказка |
|---|
When you are searching by ID, enter the full ID of the template in the search field. When you are searching by name, you can enter the full template name or its part in the search field. |
The results will be displayed automatically.
To delete the specified search and filter values use the Clear button.
Editing notification template
If you need to change notification parameters (for example, change the message text or add an additional communication channel), you can edit the notification template.
For this select the necessary template on the list and click ![]() .
.
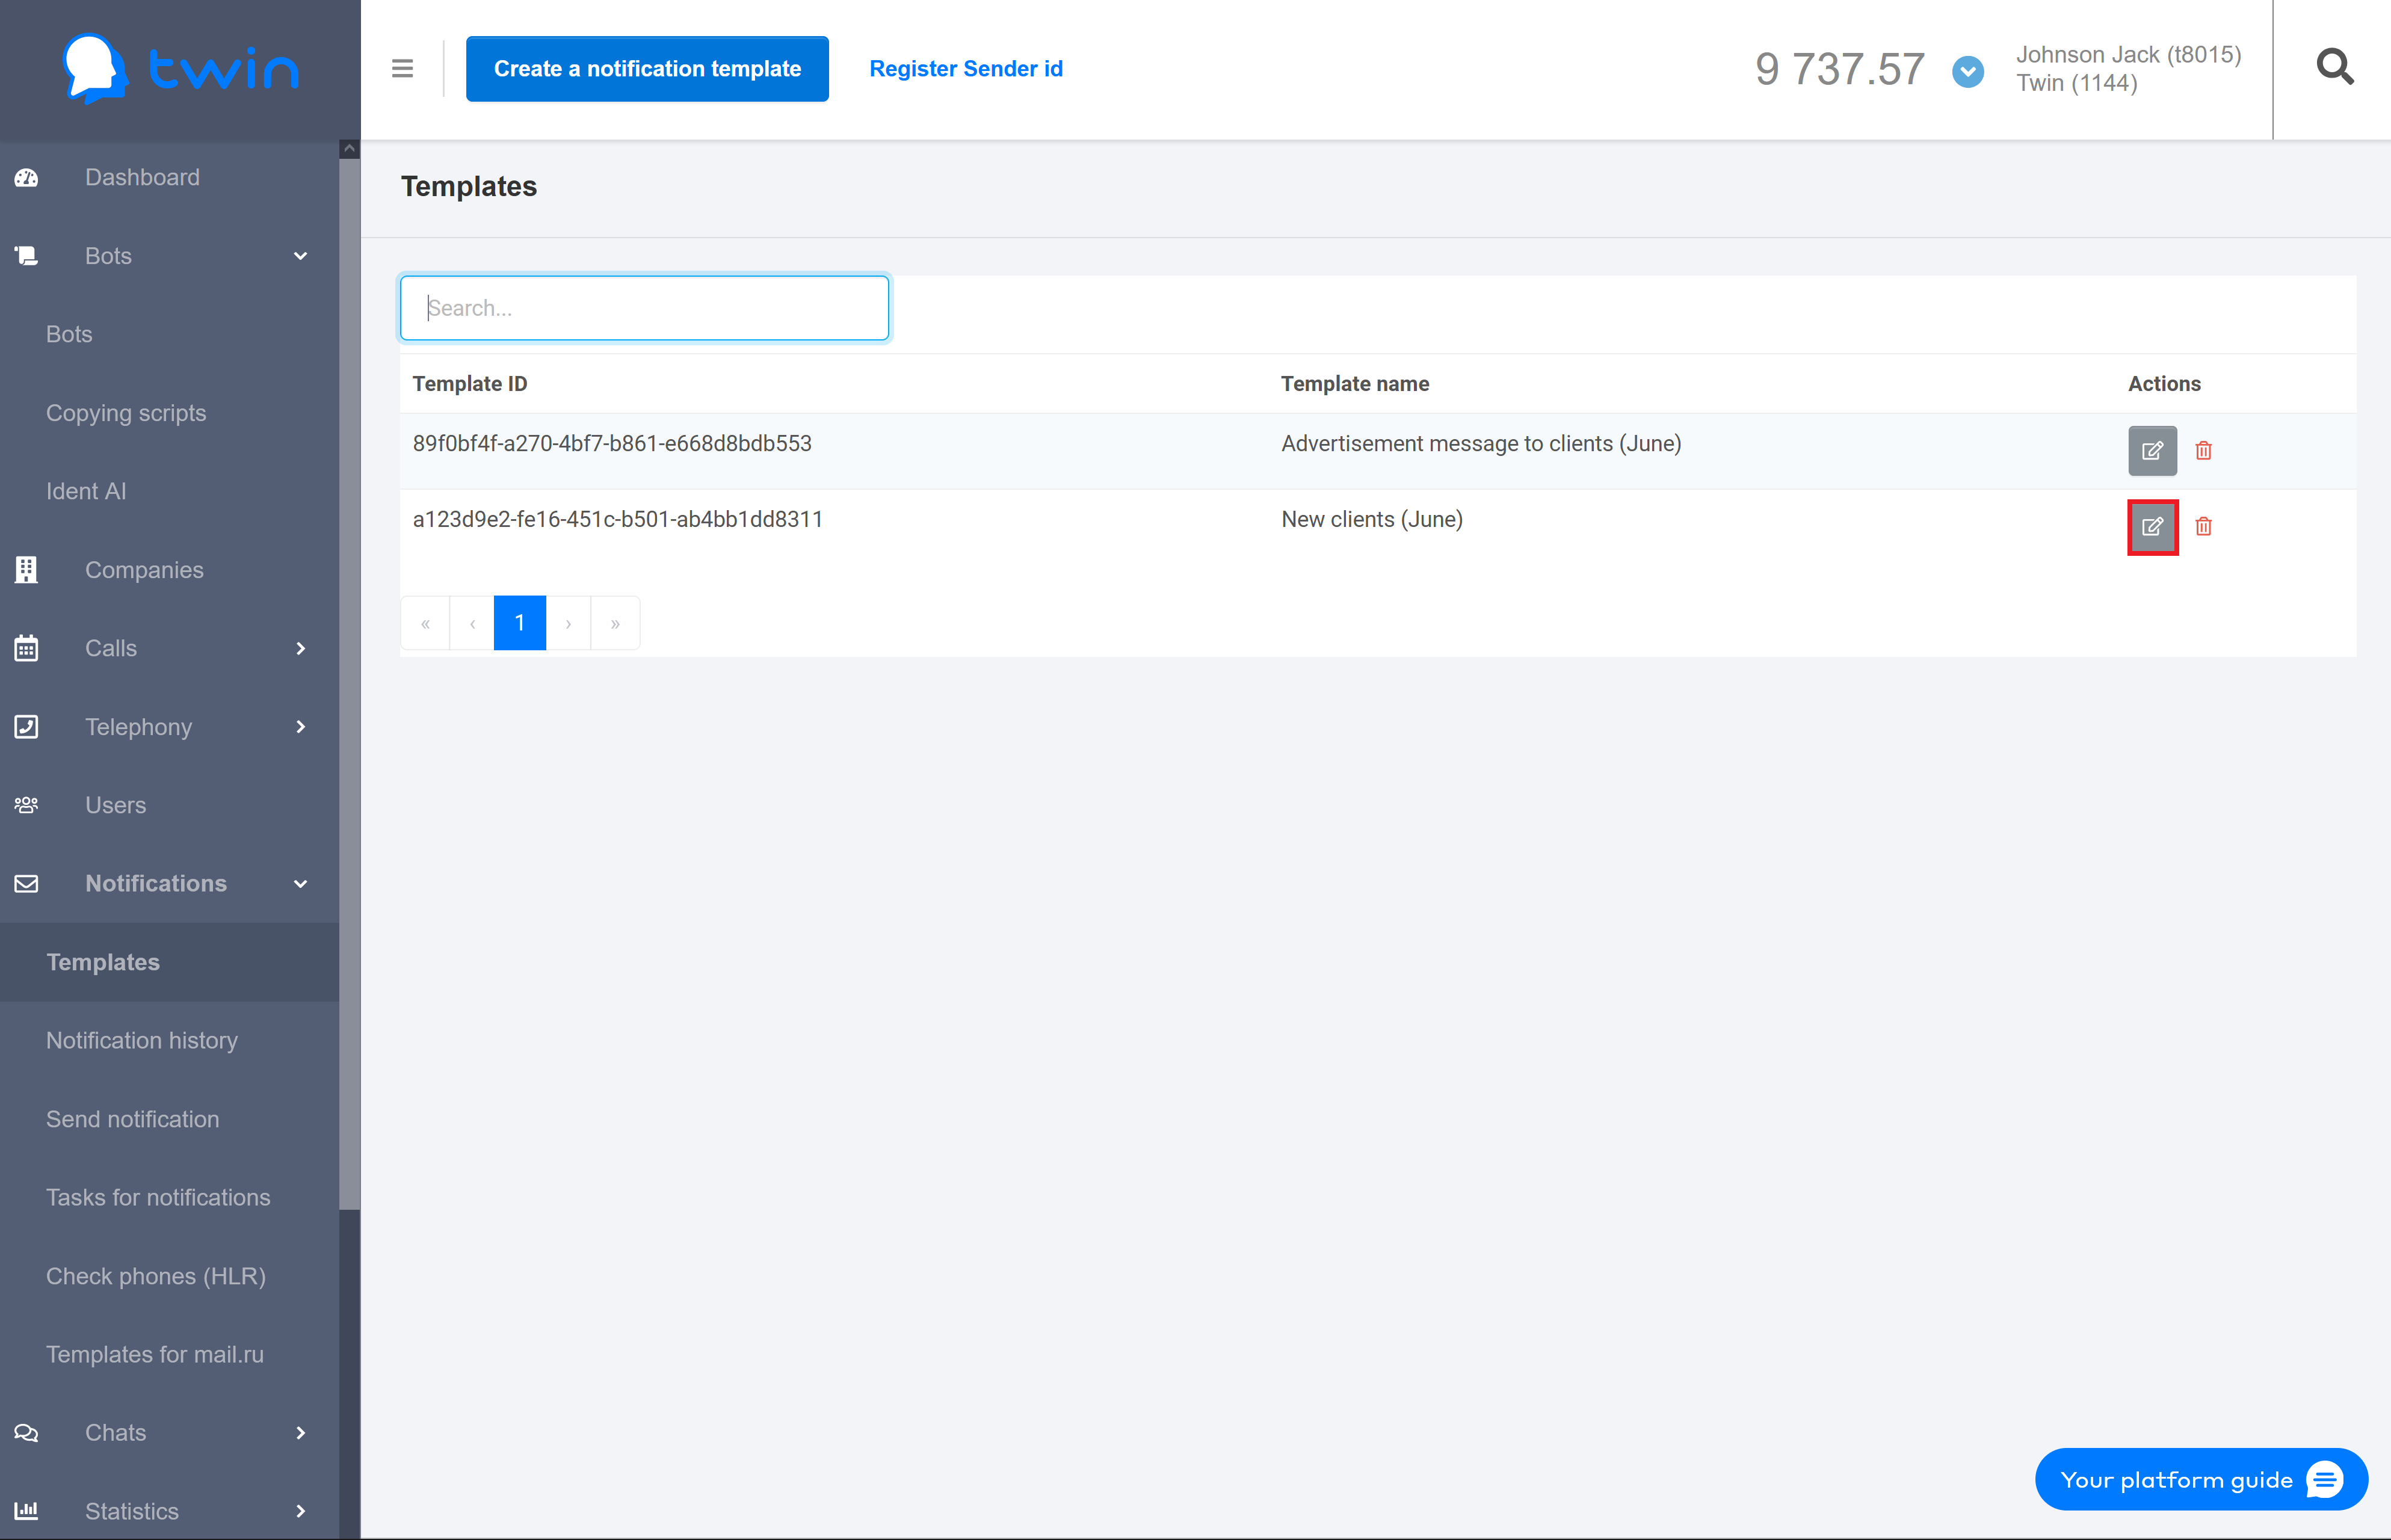
As a result a new page for editing the template will open.
Steps for editing a notification template are similar to those described in this section.
Deleting notification templates
If you do not use a certain notification template, you can delete it.
For this select the necessary template on the list and click ![]() .
.
As a result the selected message will be deleted.
Sending notifications
On the side menu select Notifications – Send notification. As a result the Send notification page will open.
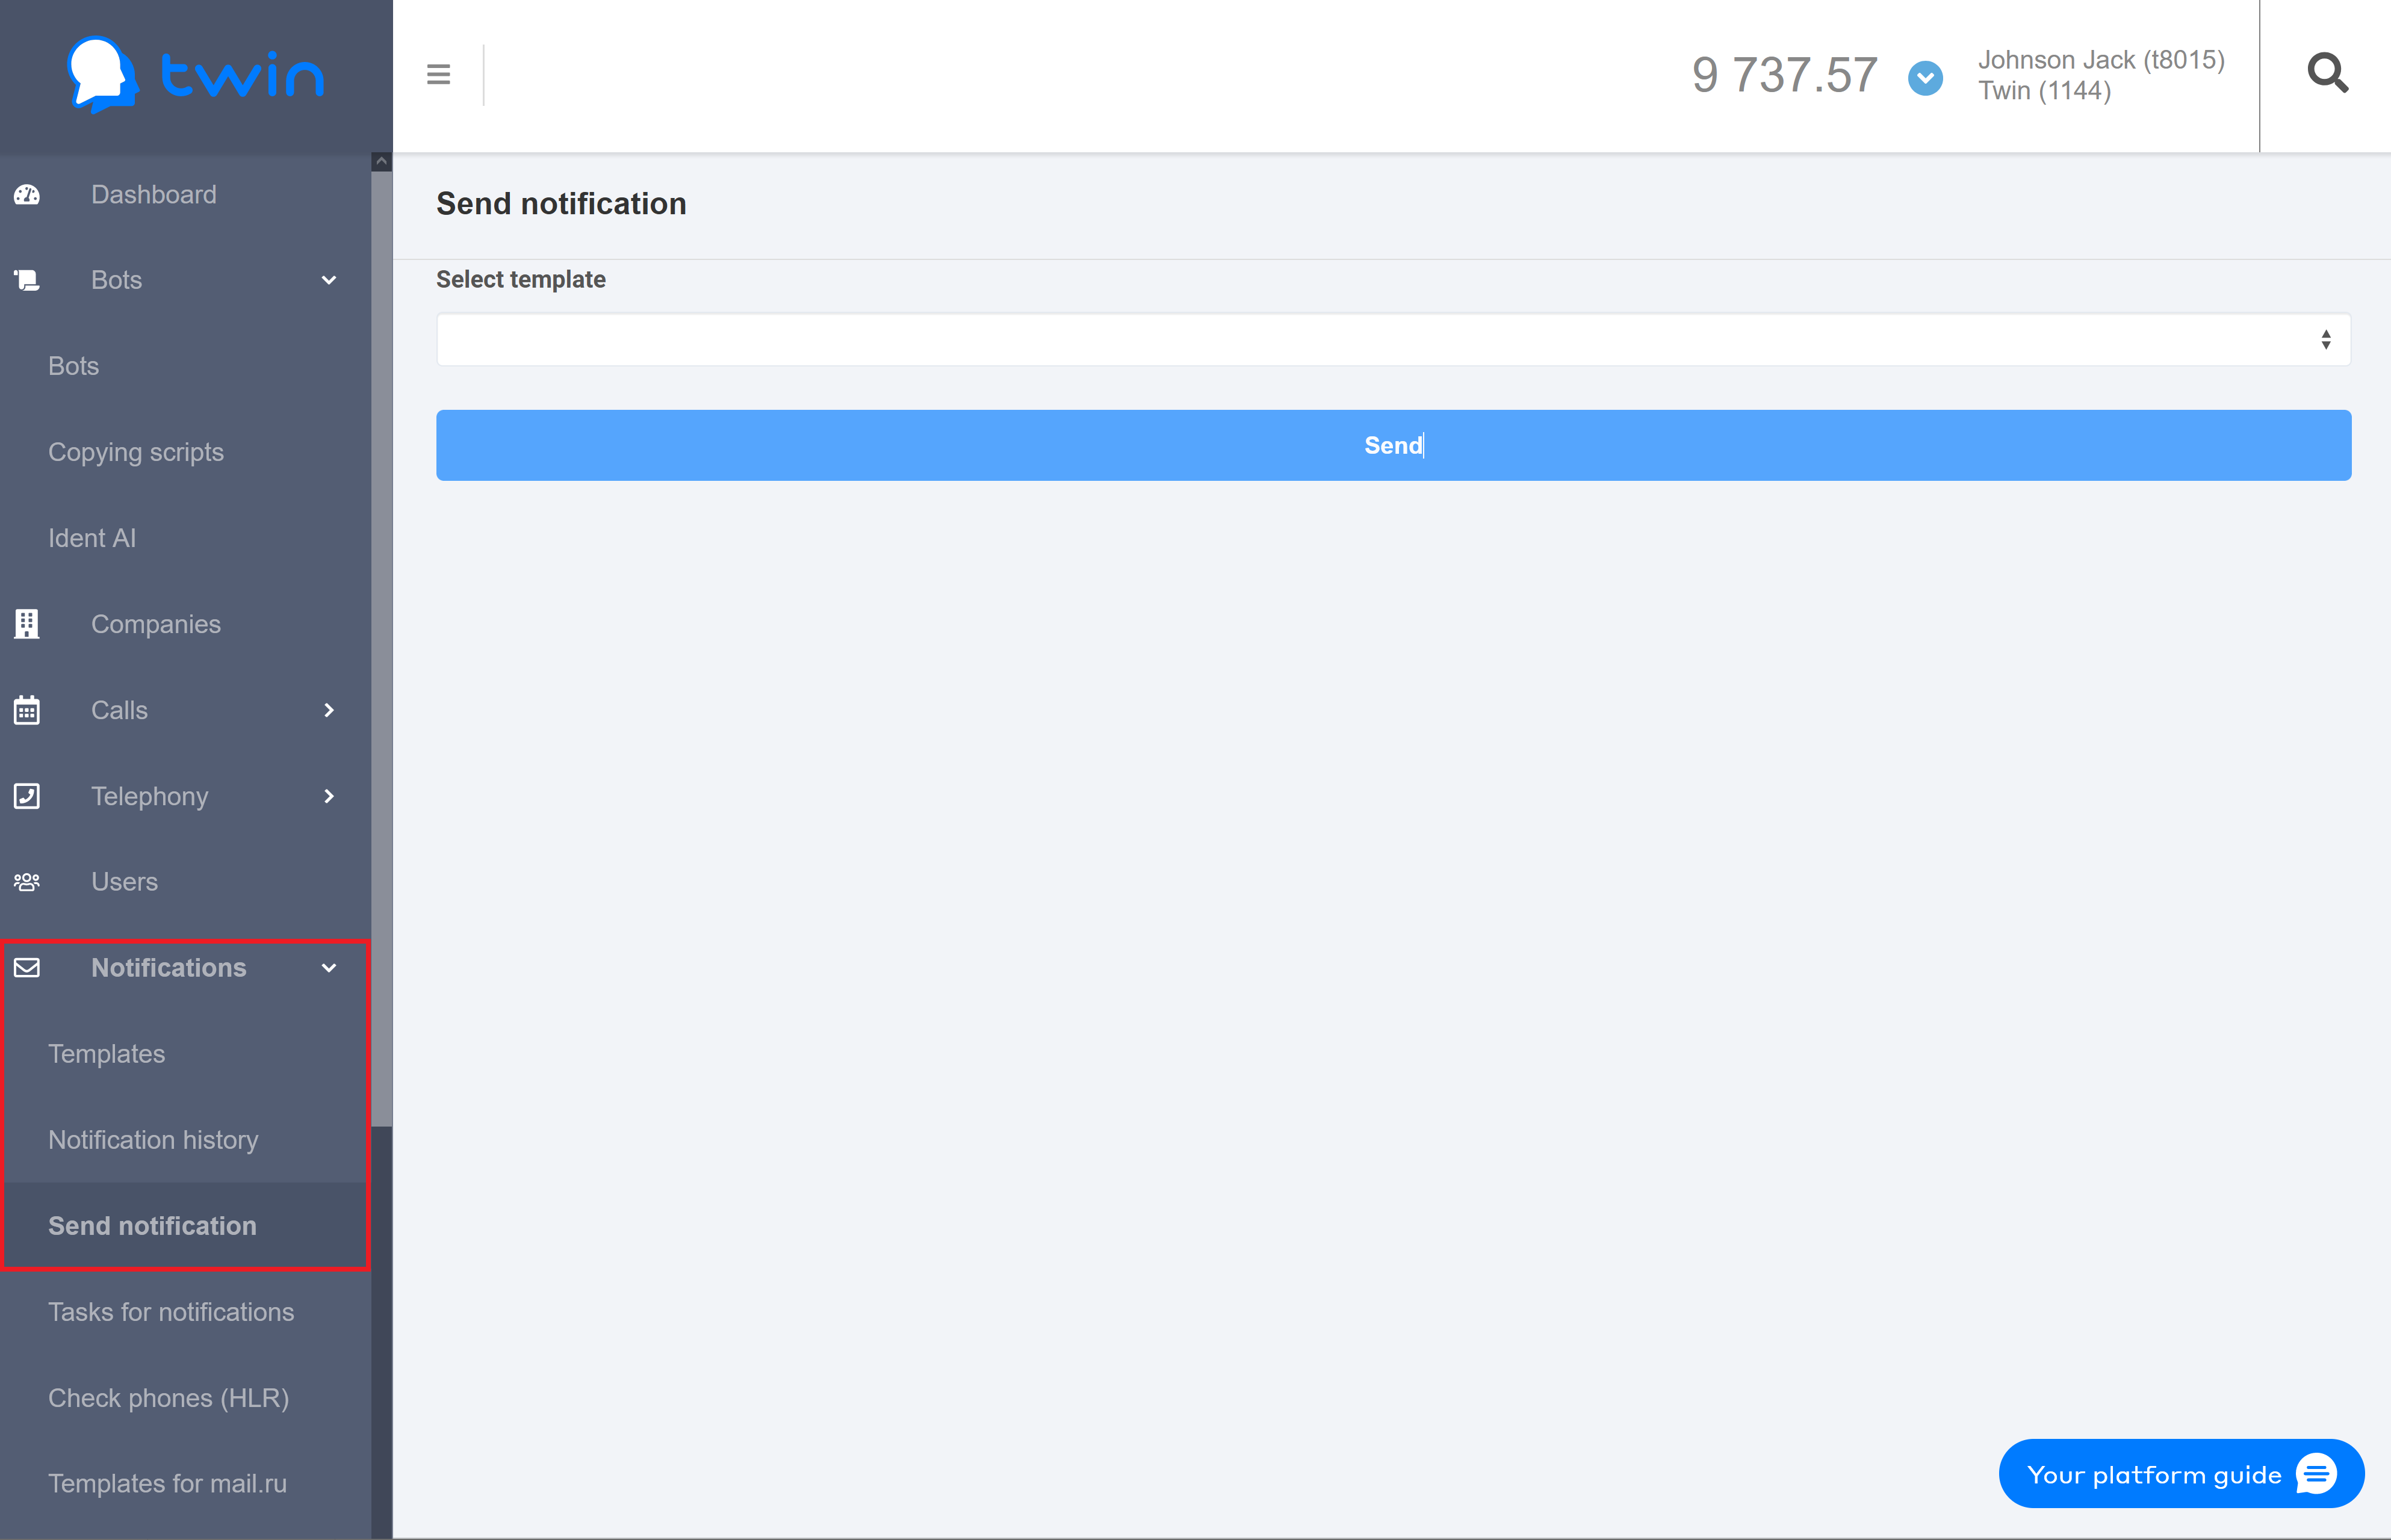
To send notifications to clients, do the following:
- In the Select template field select the necessary notification template that the system will use to send notifications to your clients.
- Click New recipient and enter the following contact information:
- External ID – recipient ID in an external CRM system.
- Phone– recipient's phone number that the system will use to send notifications via all communication channels except for email.
- Email – recipient's email address for sending notifications by email

3. In the Variables section enter variable names and their values that are used in the message text. Variables can only be used when you send notifications in Viber and as SMS.
| Подсказка |
|---|
You need to enter variable names and their values only in case the variables are used in the message text. Otherwise this section is not displayed. |
4. To send notifications click Send.
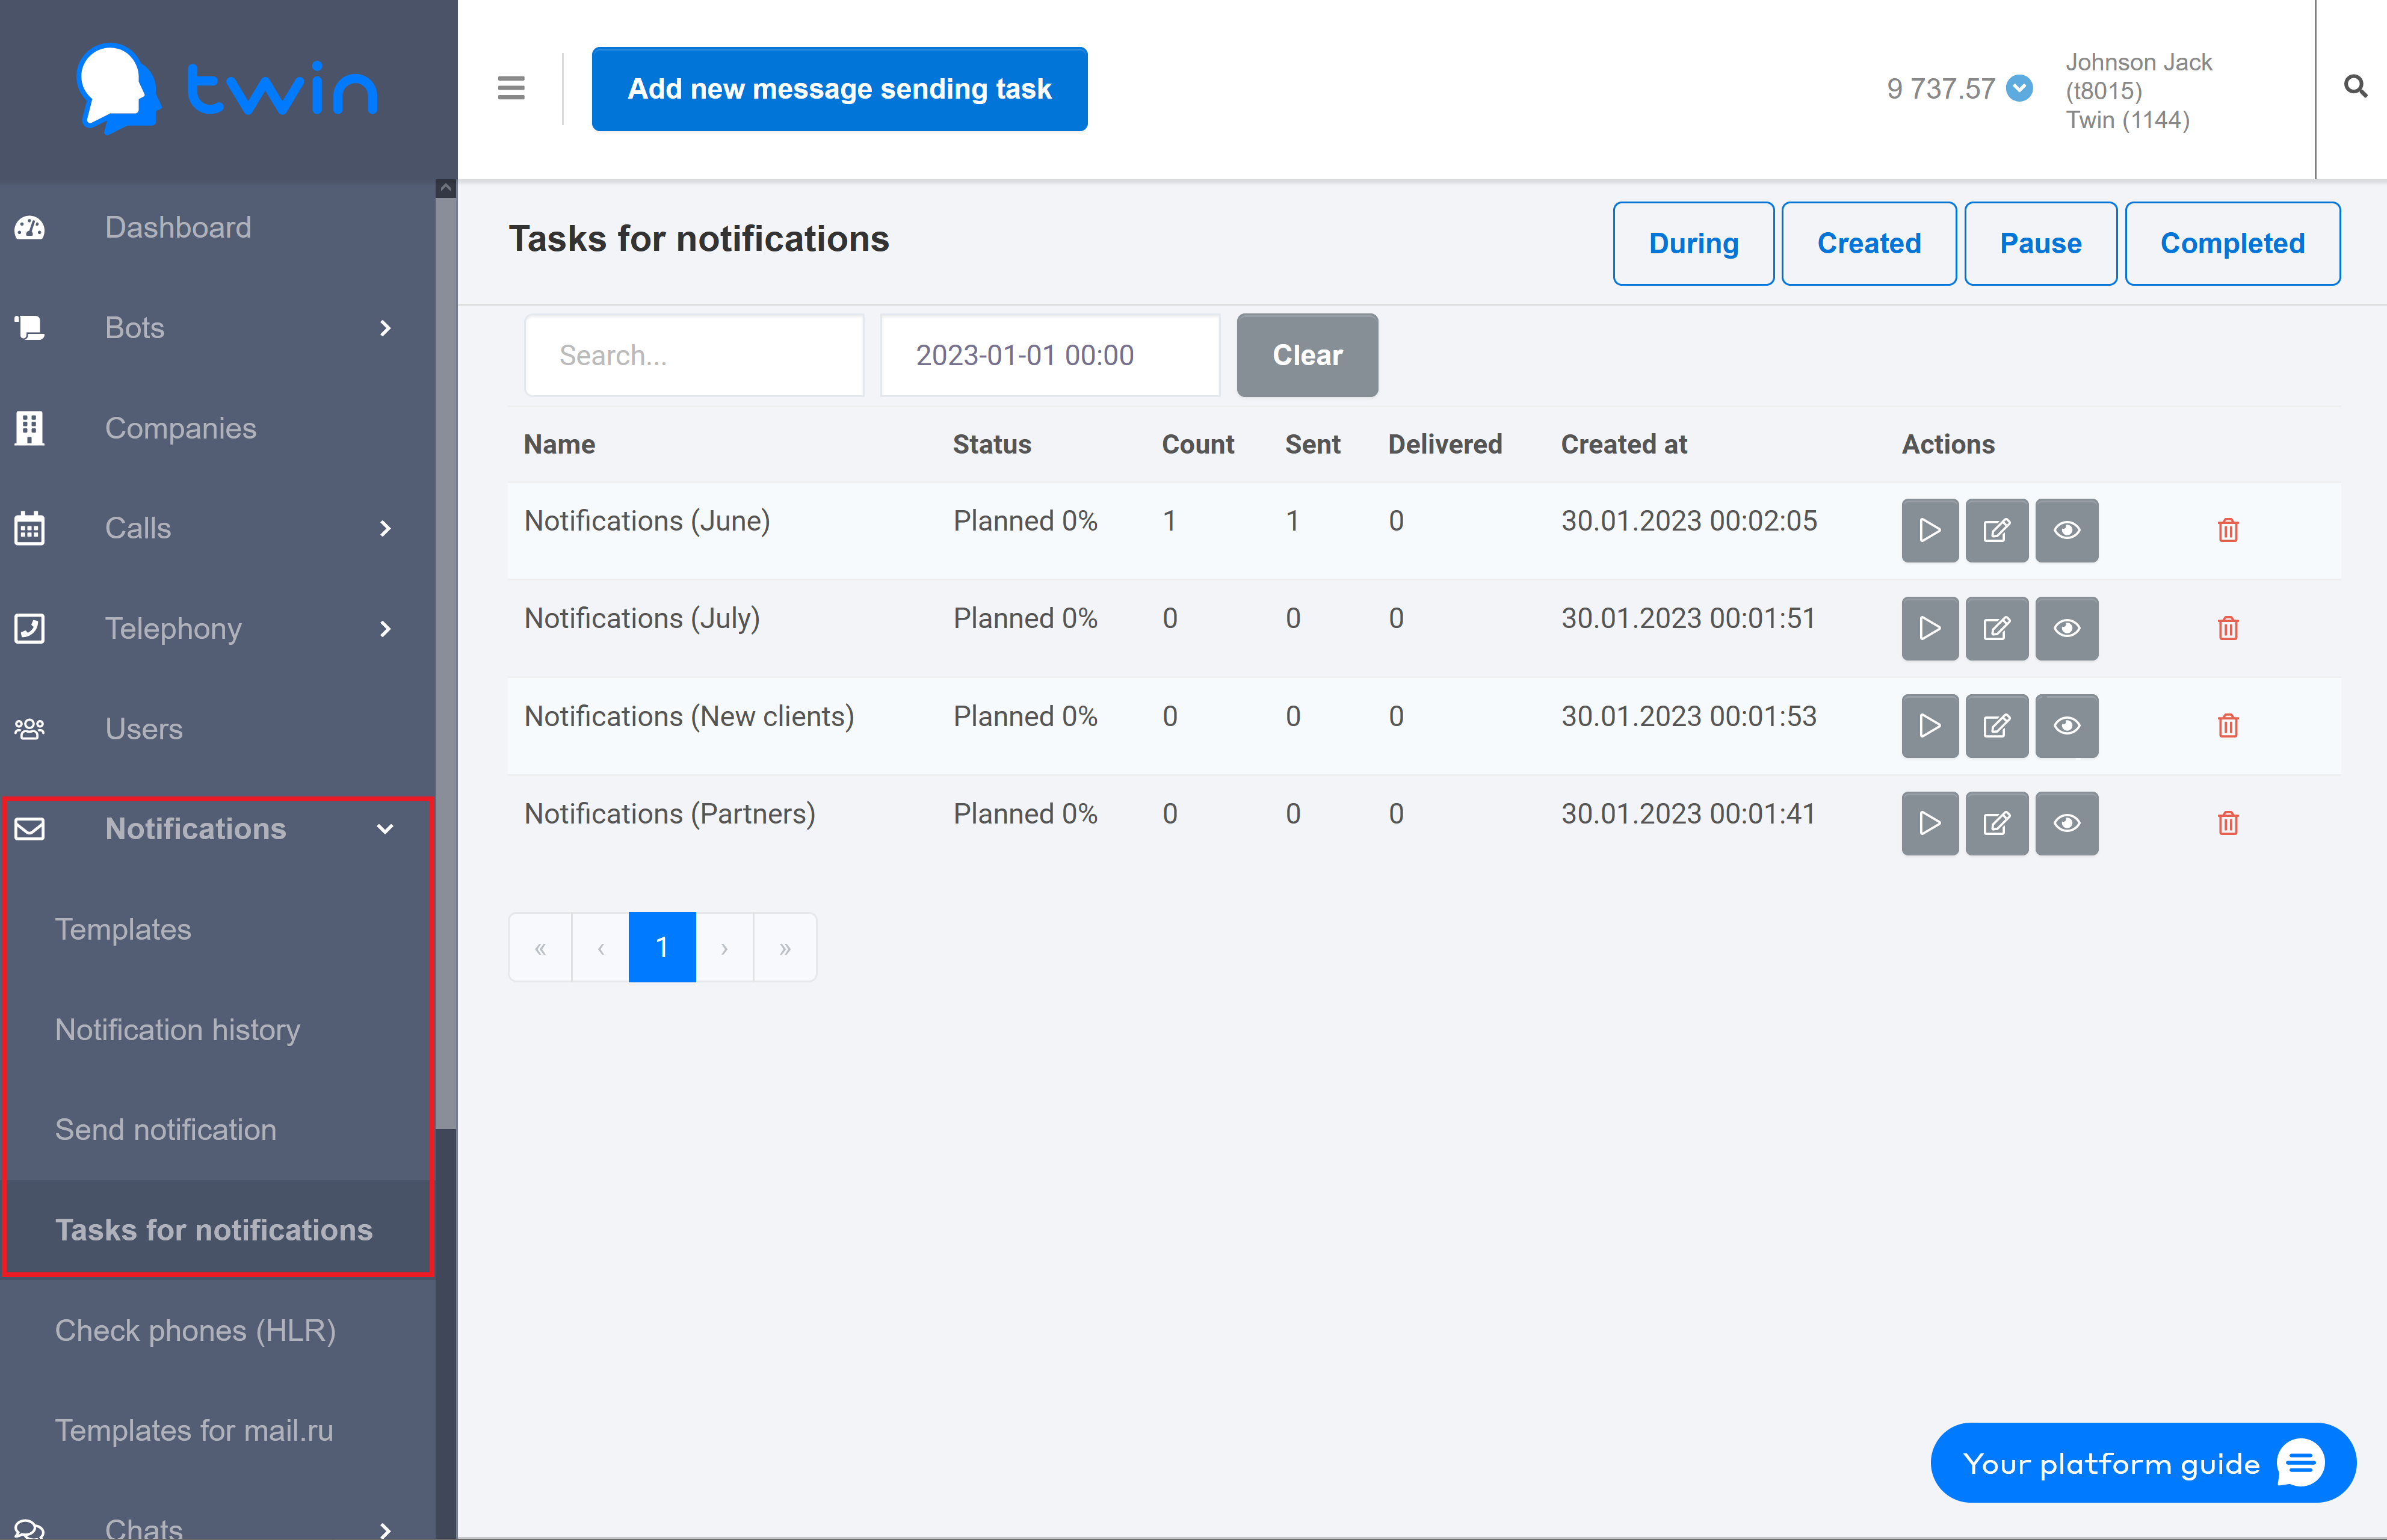
Working with notification tasks
On the side menu click Notifications – Tasks for notifications. As a result a page will open with a list of notification tasks.
| Информация |
|---|
Notifications are sent using Twin API. |
Searching for notification tasks
If there are a lot of notification tasks on the list, you can filter records you need or search for the necessary record by a notification task name or creation date.
For this use the search fields at the top of the page.

To search for notifications by name, enter the necessary value in the first field.
To search for notifications by creation date, enter the necessary value in the second field.
Results are displayed automatically.
To delete specified values use the Clear button.
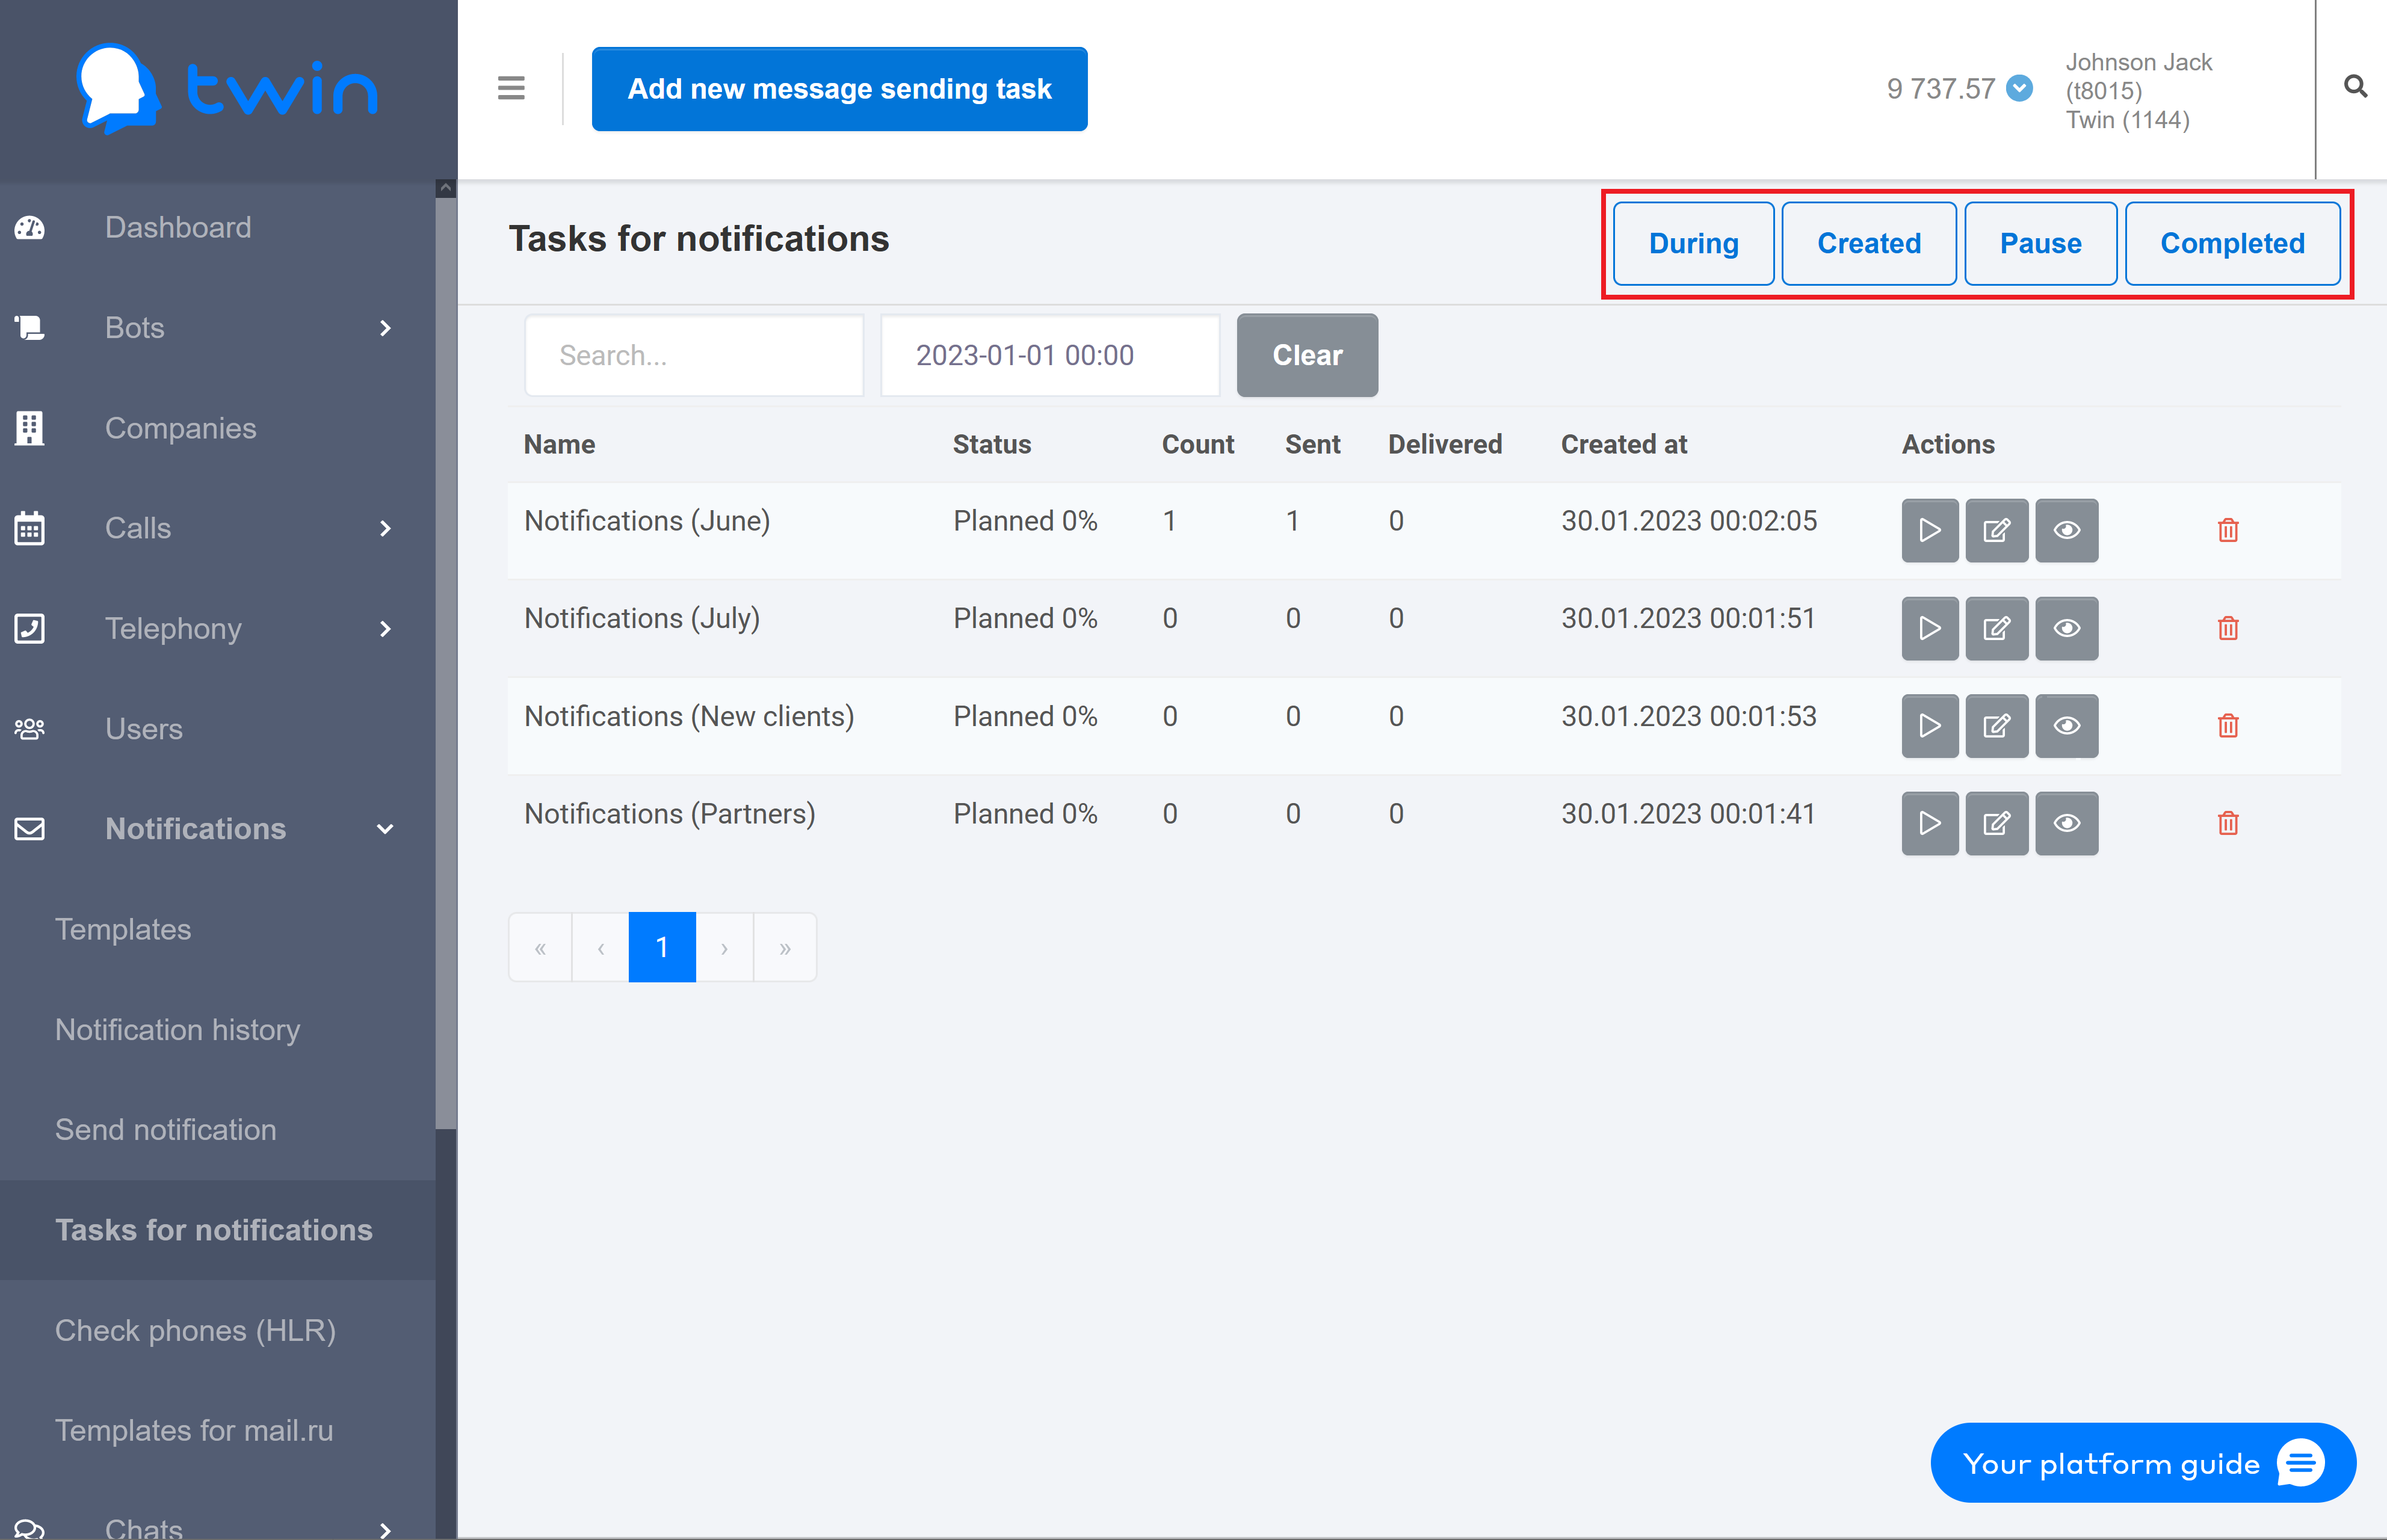
Filtering notification tasks by category
On the Task for notifications page you can filter notification tasks by the following categories:
- During – notification tasks that are currently in progress
- Created – all created notification tasks that are scheduled for execution
- Paused – notification tasks that are on pause
- Completed – all completed notification tasks
To filter notification tasks by category use the buttons located at the top right corner of the page.
Creating a new notification task
On the Task for notifications page click Add new message sending task.
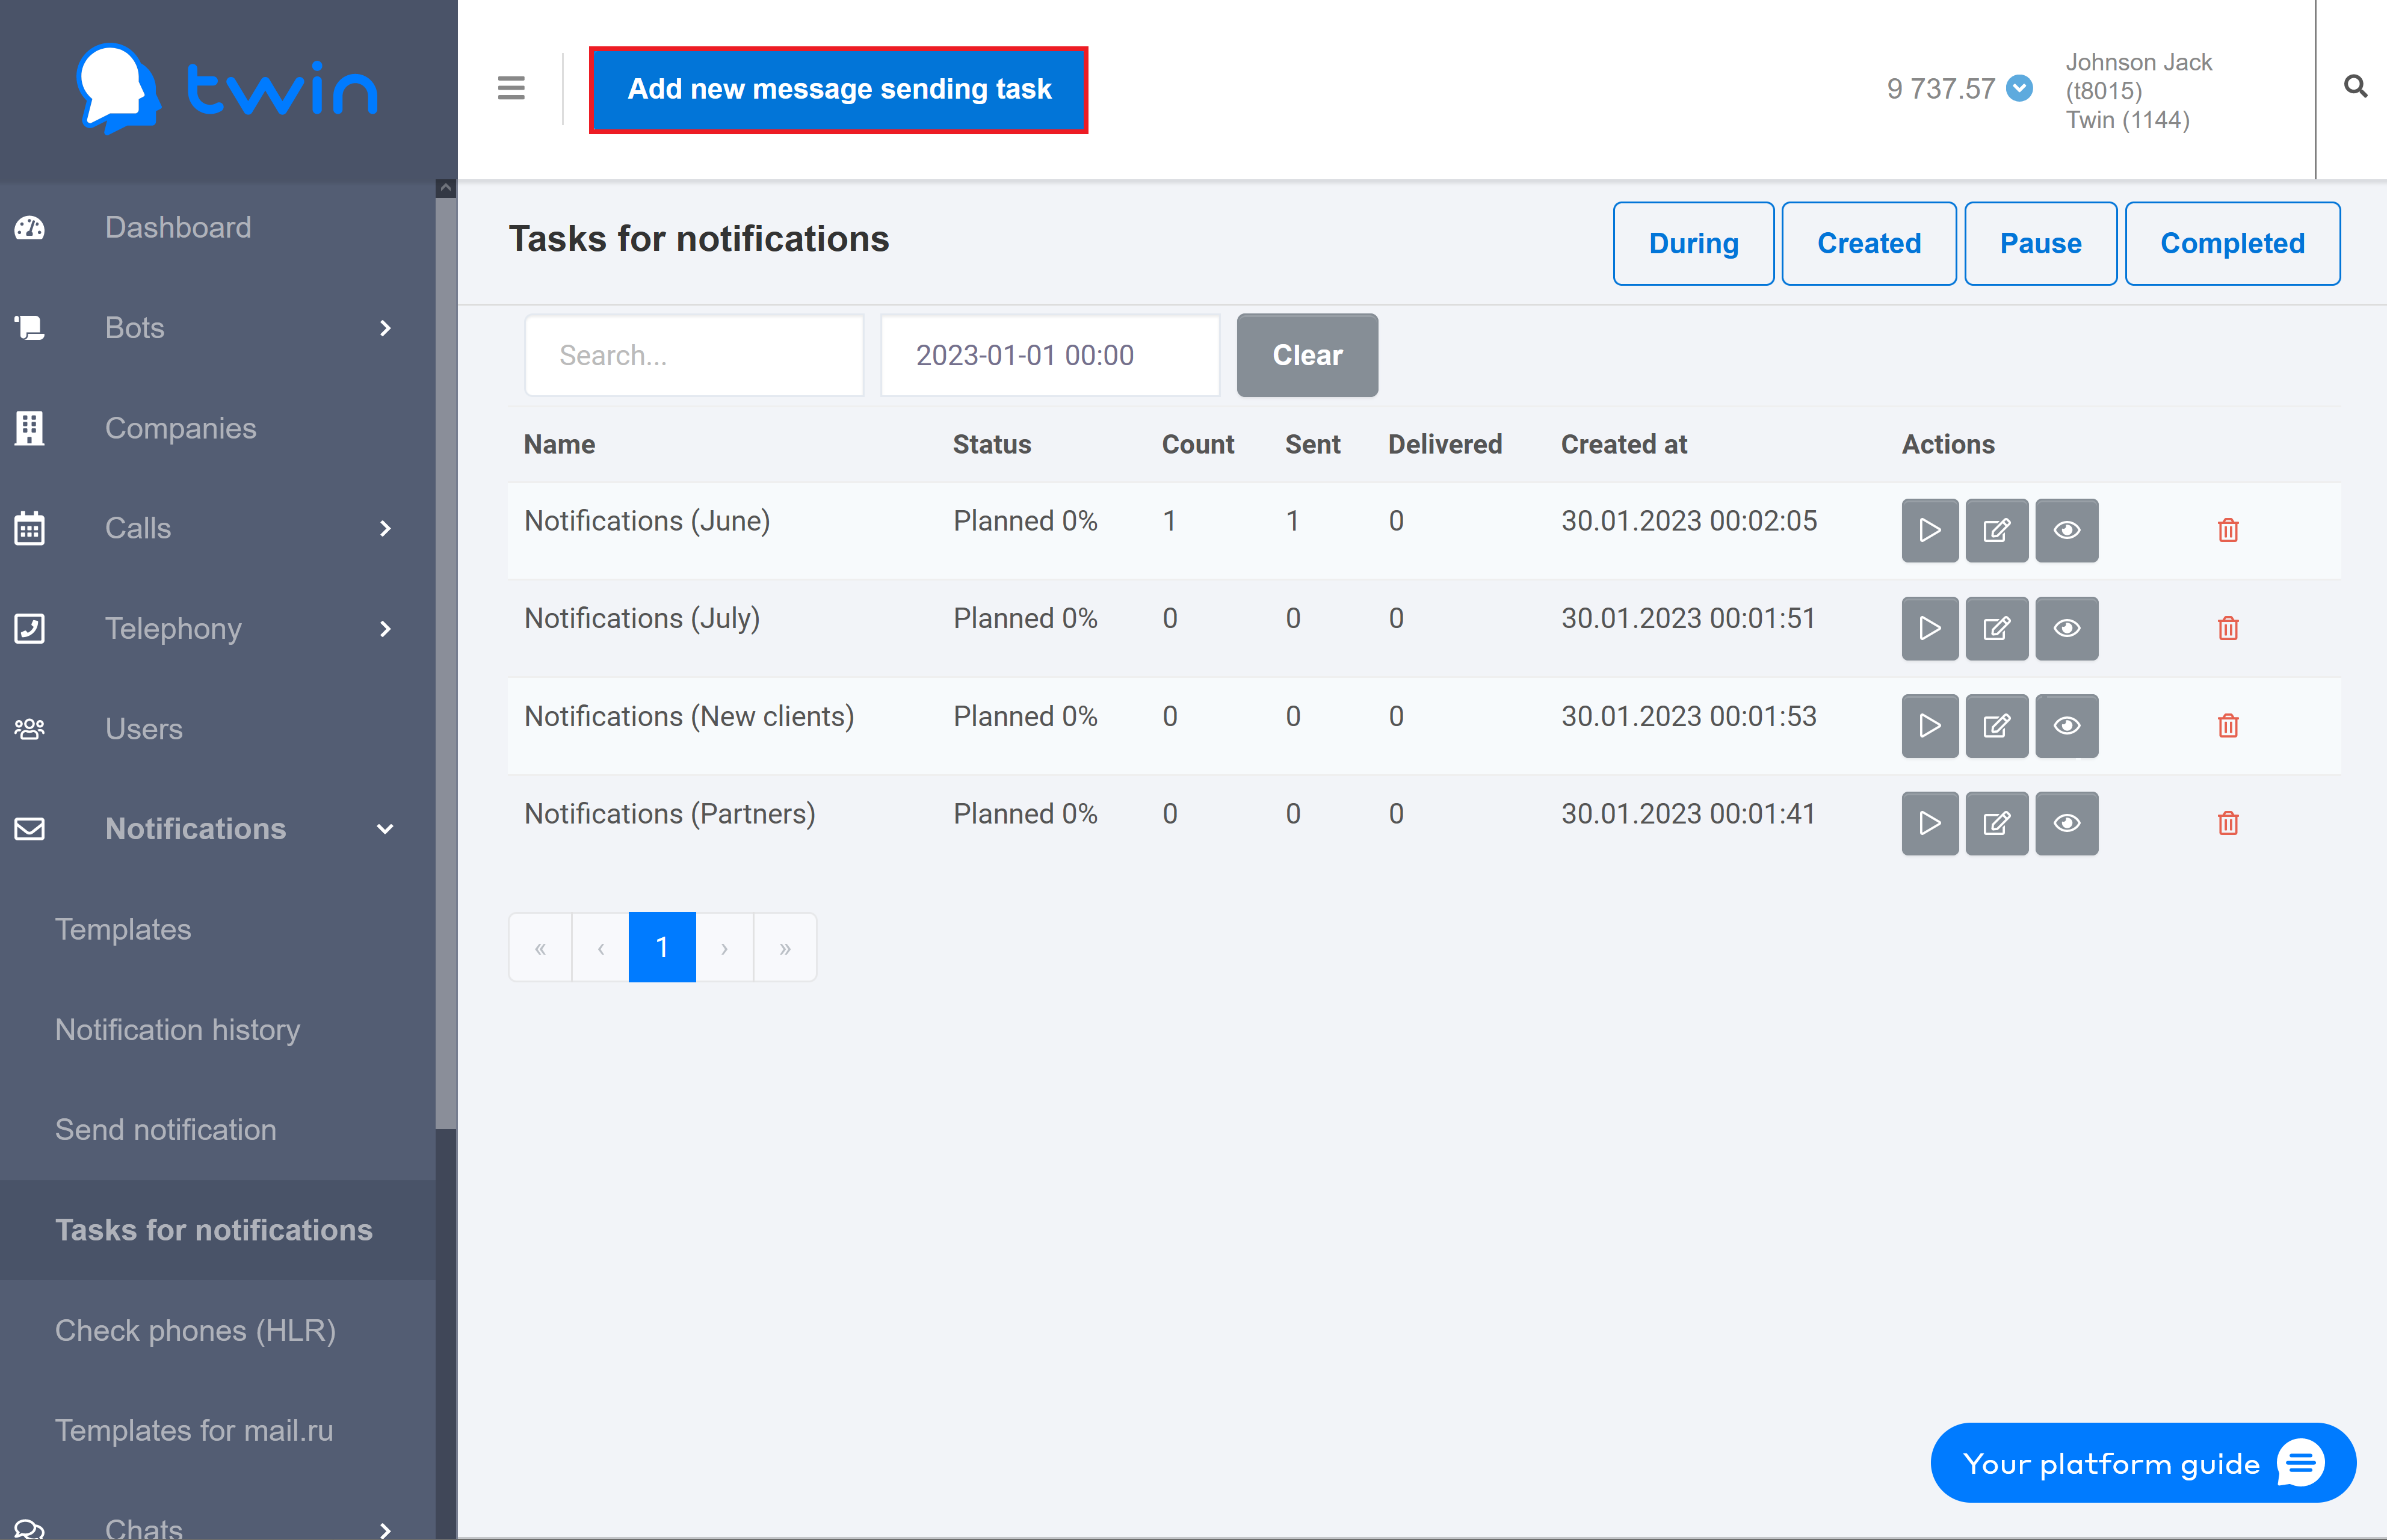
As a result the Add new message sending task dialog window will open.
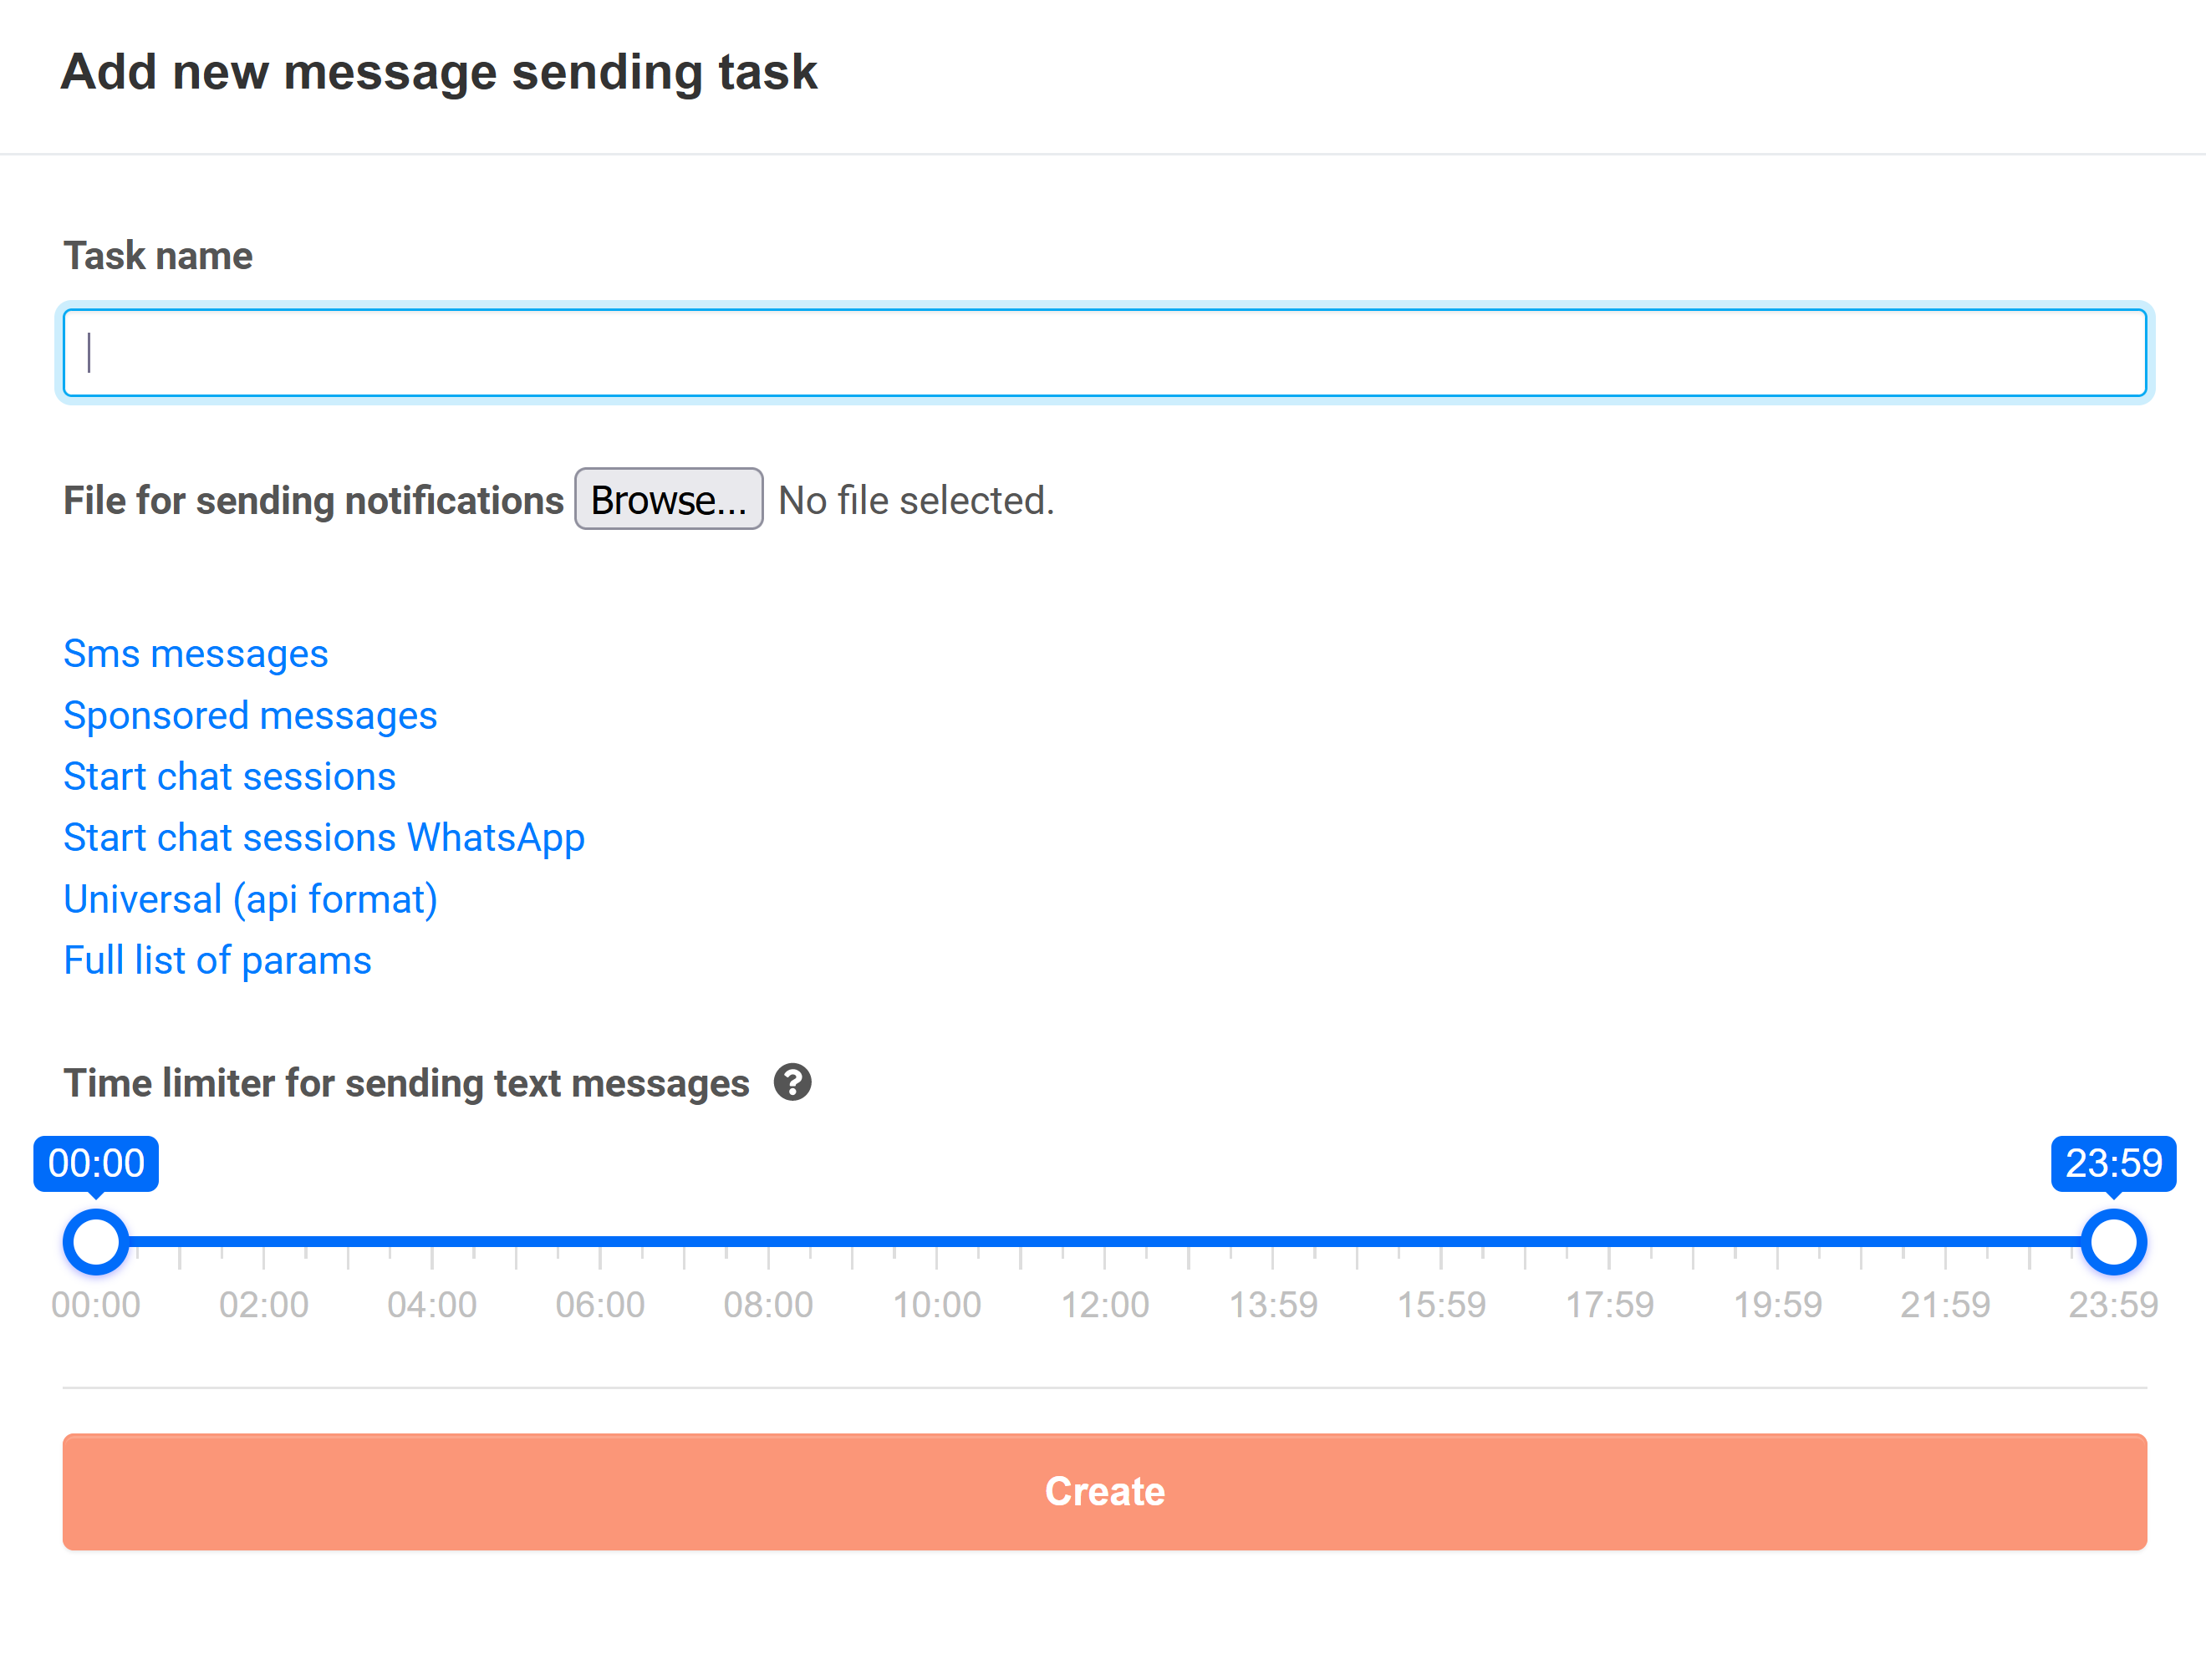
To create a new notification task, do the following:
- In the Task name field enter a name for a new task.
| Информация |
|---|
It is recommended to use simple and concise names. Later this will help you quickly find a certain notification task on the list. |
2. Click the Select file button and select the necessary template with the parameters of the notification task. The template is stored as an Excel file.
| Информация |
|---|
You can download templates for the following types of notification tasks:
|
3. In the Time limiter for sending text messages field select the period of time for the system to send notifications.

4. To save changes click Create.
As a result a new notification task will appear on the list.
Editing notification tasks
To edit a notification task click ![]() in the line for the necessary record.
in the line for the necessary record.

As a result the Change new message sending task dialog window will open.

Steps for editing a notification task are similar to those described in this section.
Deleting notification tasks
If you do not use a certain notification task, you can delete it.
For this select the necessary record on the list and click ![]() .
.
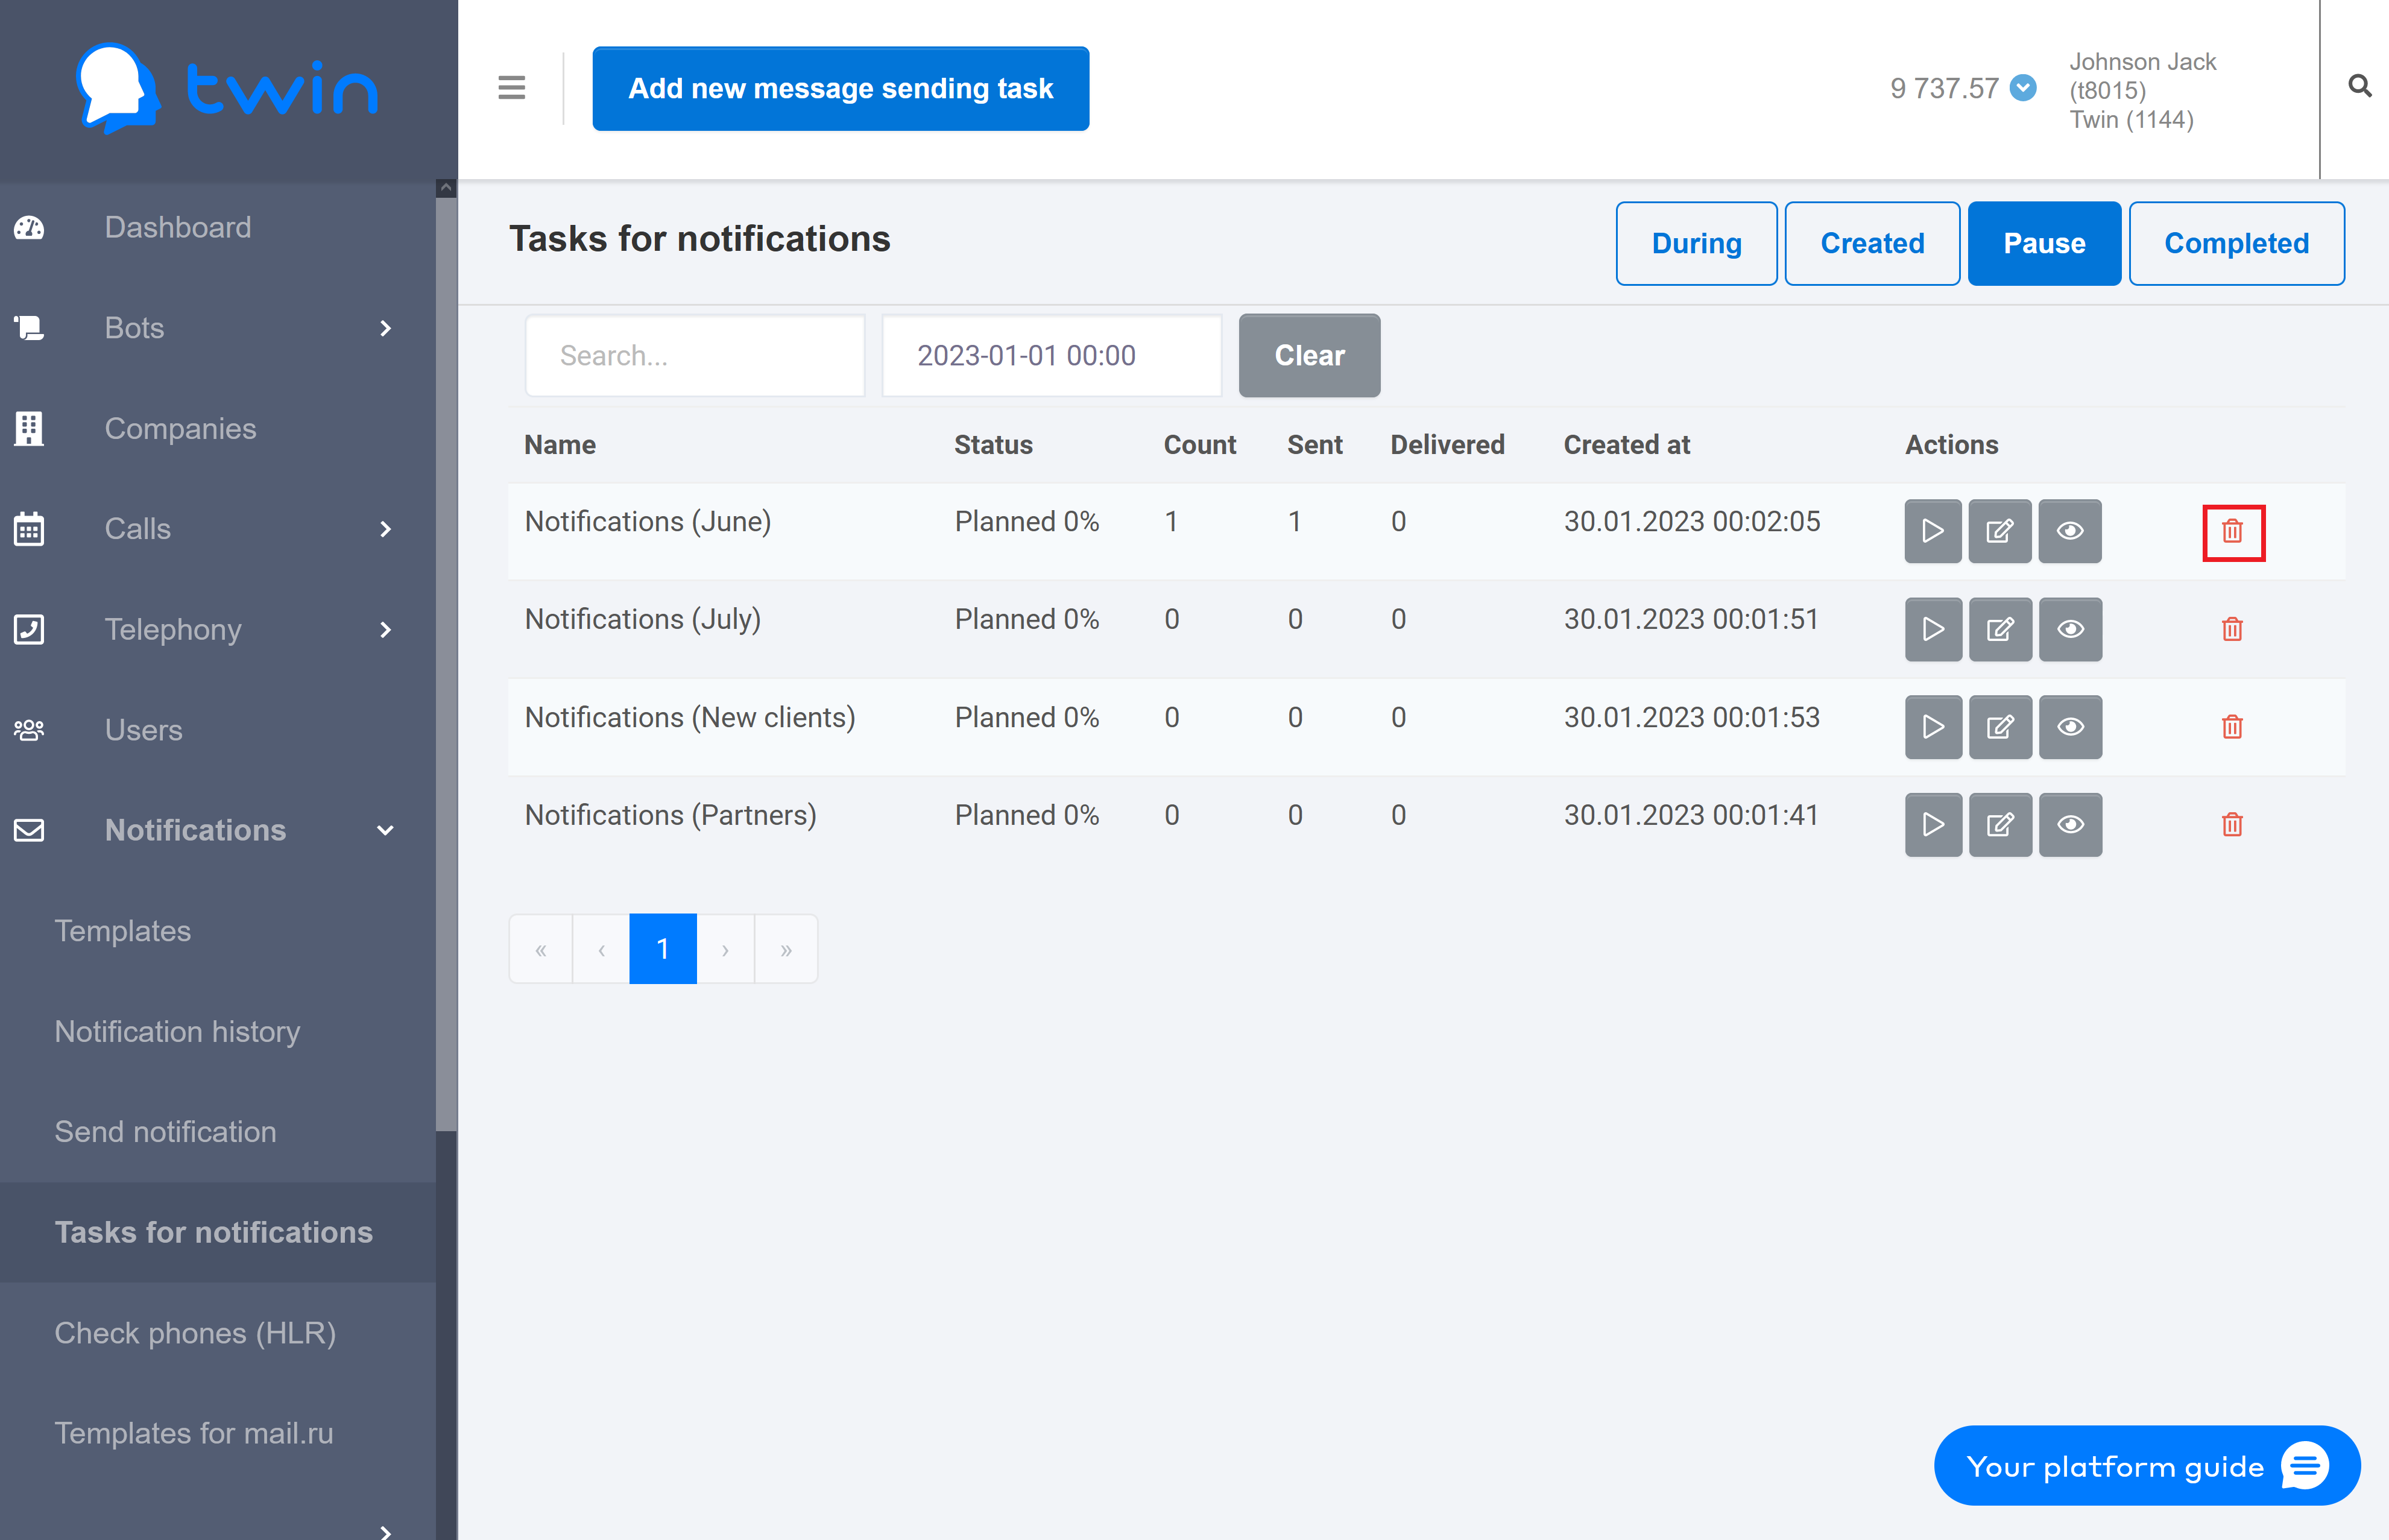
As a result the selected notification task will be deleted.
Viewing notification history
On the side menu click Notifications – Notification history.

To view information about a notification task, select the necessary record on the list and click ![]() .
.

Verifying phone numbers
On the side menu click Notifications – Check phones (HLR). As a result the Check phones (HLR) page will open.

This page contains information about all notifications that were sent to clients using Twin API.
The page contains the following information:
- Client phone numbers that the system used to send notifications
- Delivery status
- Creation date
- Cost
Searching for verified phone numbers
If there are a lot of records on the list, you can filter records you need or search for the necessary record by a client phone number or time.
For this enter the necessary value in the search fields at the top of the page.
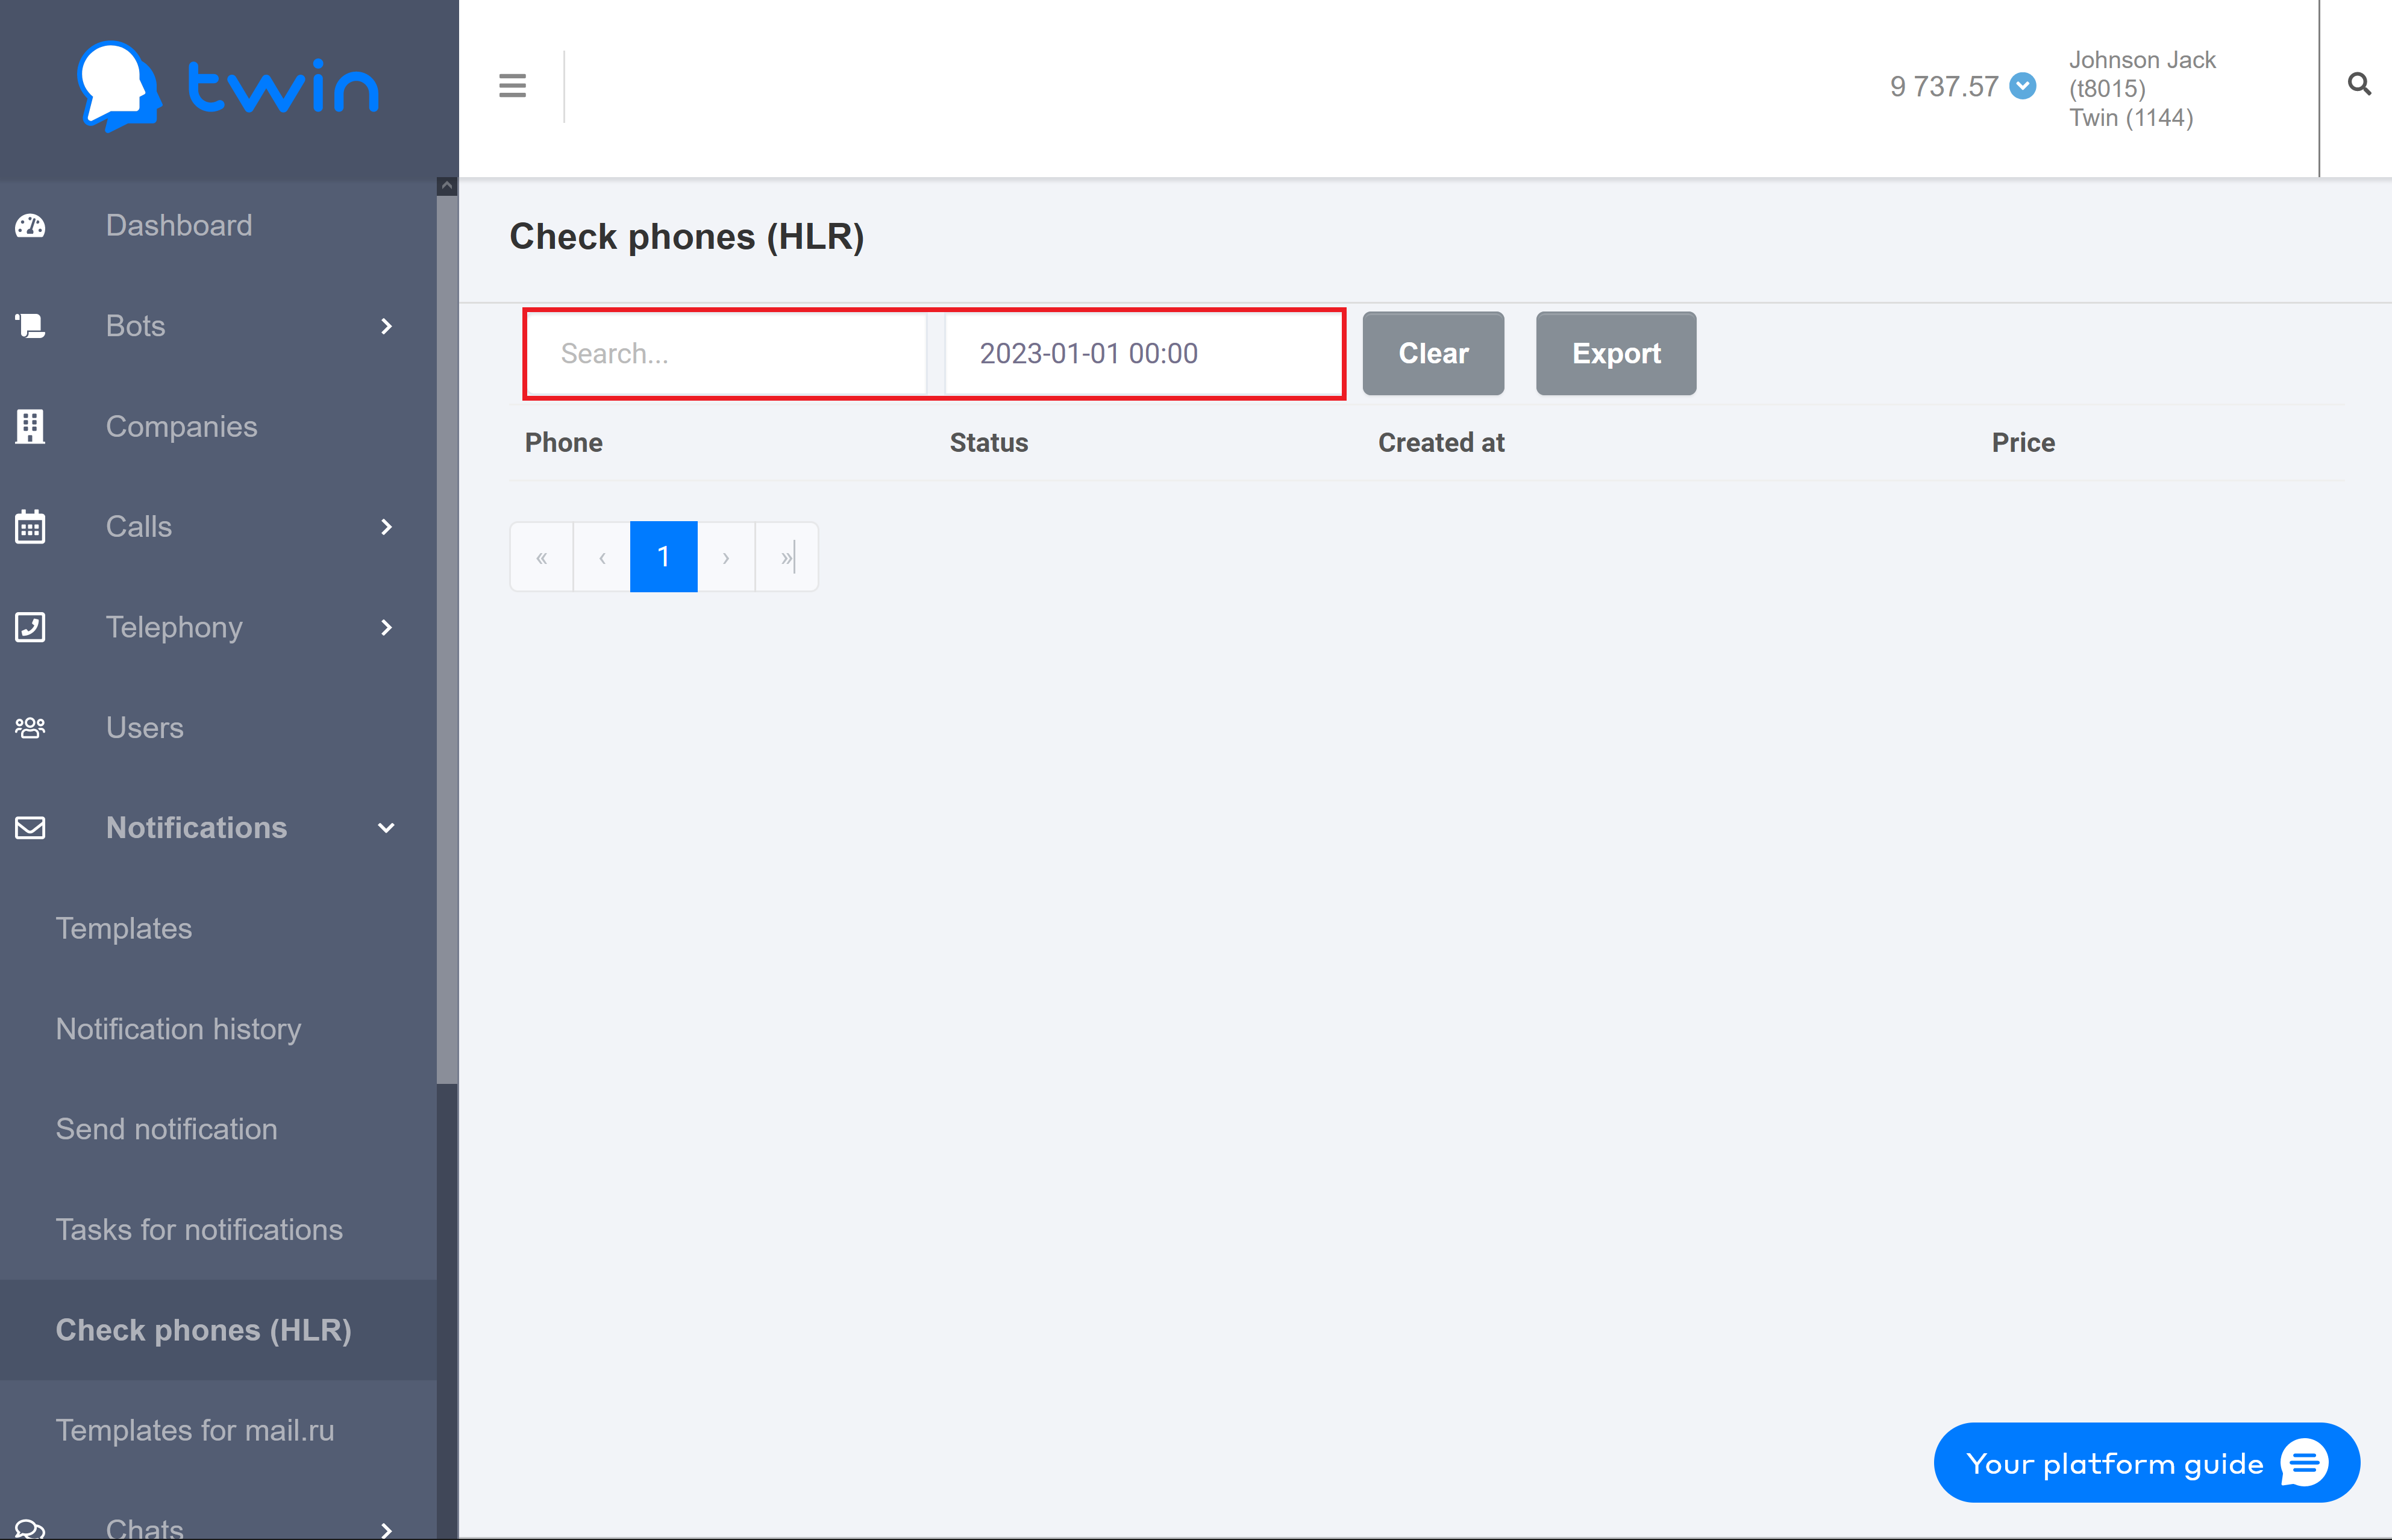
To search for records by a phone number, enter the necessary number or its part in the first search filed.
To search for records by time, select the necessary period of time in the second search filed.
Search results are displayed automatically.
To delete specified values use the Clear button.
Creating a report for verified phone numbers
To create a report with information about verified phone numbers click Export.
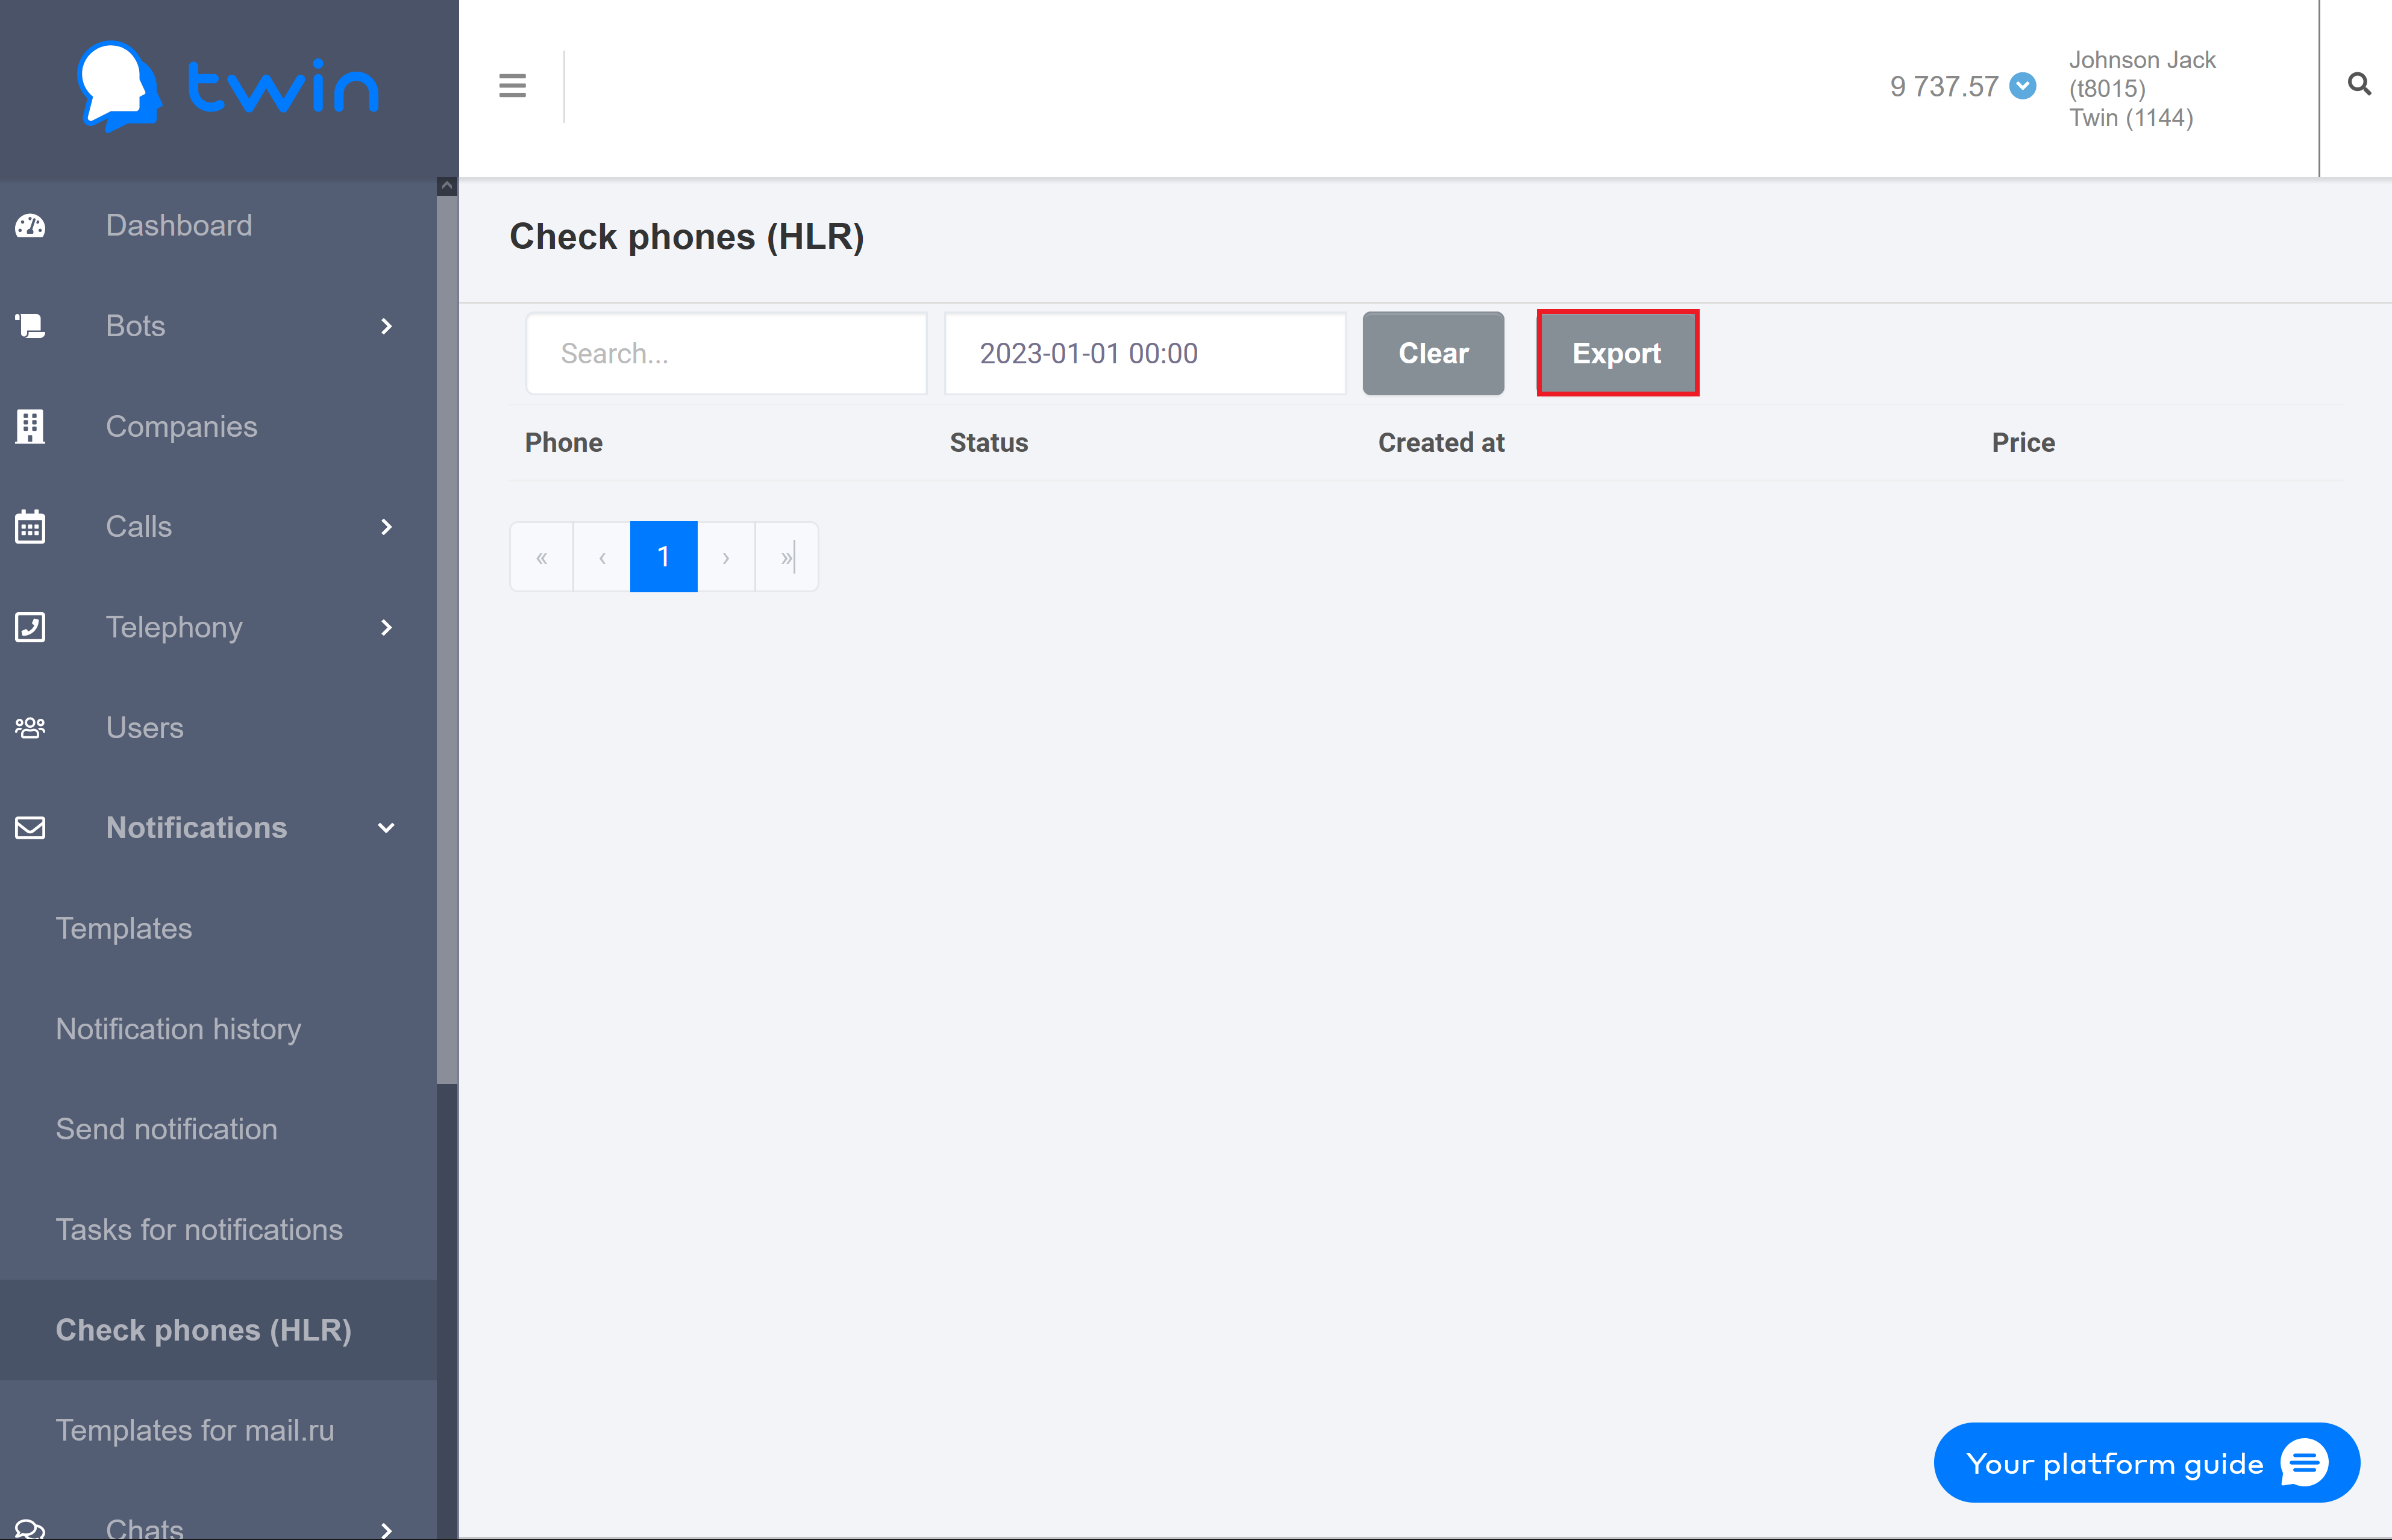
The system will create an Excel that contains all displayed information.
Просмотр отправленных сообщений
В разделе Просмотр сообщений отображается список, в котором представлена общая информация по всем клиентским рассылкам (номер получателя, статус сообщения, канал связи, который система использовала для отправки сообщения, время создания сообщения и др.).
В верхней части страницы расположены элементы управления для фильтрации и поиска сообщений.

При помощи поля Поиск вы можете выполнять поиск по номеру получателя, а также по имени канала связи, который система использовала для рассылки сообщений.
В следующем поле можно задать желаемый период, в течение которого были созданы сообщения, а также указать время создания. В результате в списке будут отображаться только те сообщения, которые отвечают заданным условиям.
В поле Все каналы можно выбрать канал, который система использовала для рассылки. После этого в списке будут отображаться все сообщения, отправленные по этому каналу.
В поле Все статусы можно выбрать желаемый статус сообщений.
| Раскрыть | ||
|---|---|---|
| ||
|
Для просмотра текста сообщения нажмите кнопку ![]() напротив нужного сообщения.
напротив нужного сообщения.

Откроется окно просмотра сообщения.

| Подсказка | ||||||||||||||||
|---|---|---|---|---|---|---|---|---|---|---|---|---|---|---|---|---|
В разделе Просмотр сообщений вы также можете сформировать отчет с полной информацией обо всех сообщениях компании, согласно установленным настройкам, о которых говорилось выше. По умолчанию, если не устанавливать настройки даты, отчет включает в себя сообщения с начала месяца. Для этого нажмите кнопку Экспорт.
|
...
| Button Hyperlink | ||||||||||||
|---|---|---|---|---|---|---|---|---|---|---|---|---|
|